Introduction
To collect capacity information, the Storage All-in-One ETL either connects to the storage system itself or to a proxy.
In large environments where many systems are attached to a same proxy, performance issues can be observed. To prevent these issues, you can specify the storage systems for which you want to collect capacity information, and therefore discard storage systems that are no longer in use.
In this article, you will learn how to:
- Retrieve the list of systems IDs from Dell EMC Unisphere for VMAX/PowerMax, Hitachi Command Suite/Configuration Manager, and NetApp ActiveIQ Unified Manager.
- Configure the ETL to collect capacity information for the most relevant storage systems.
Note: The storage system filtering feature is available starting from v1.26.00 of Storage All-in-One ETL.
Prerequisites
Before configuring the Storage All-in-One ETL task:
-
Go to Administration > System > Maintenance and make sure Storage All-in-One ETL v1.26.00 or higher is installed.

-
Read these articles to make sure the prerequisites are met:
Procedure
Dell EMC Unisphere for VMAX/PowerMax
Retrieving system IDs
To retrieve the list of system IDS, run the curl command corresponding to your version of Unisphere:
-
For Unisphere versions up to 9.2:
curl -k -u <username>:<password> -X GET HTTPS://<hostname>:8443/univmax/restapi/91/system/symmetrix -
For Unisphere versions 10+:
curl -k -u <username>:<password> -X GET HTTPS://<hostname>:8443/univmax/restapi/100/system/symmetrix
Example:
curl -k -u smc:***** -X GET HTTPS://qa-emc10:8443/univmax/restapi/100/system/symmetrix
Expected output:
   {
      "symmetrixId": [
            "000297600252",

            "000297600253",

            "000297801702",

            "000297801704"
      ]
   }
Configuring the Dell VMAX/PowerMax ETL
To configure a Dell VMAX/PowerMax ETL
-
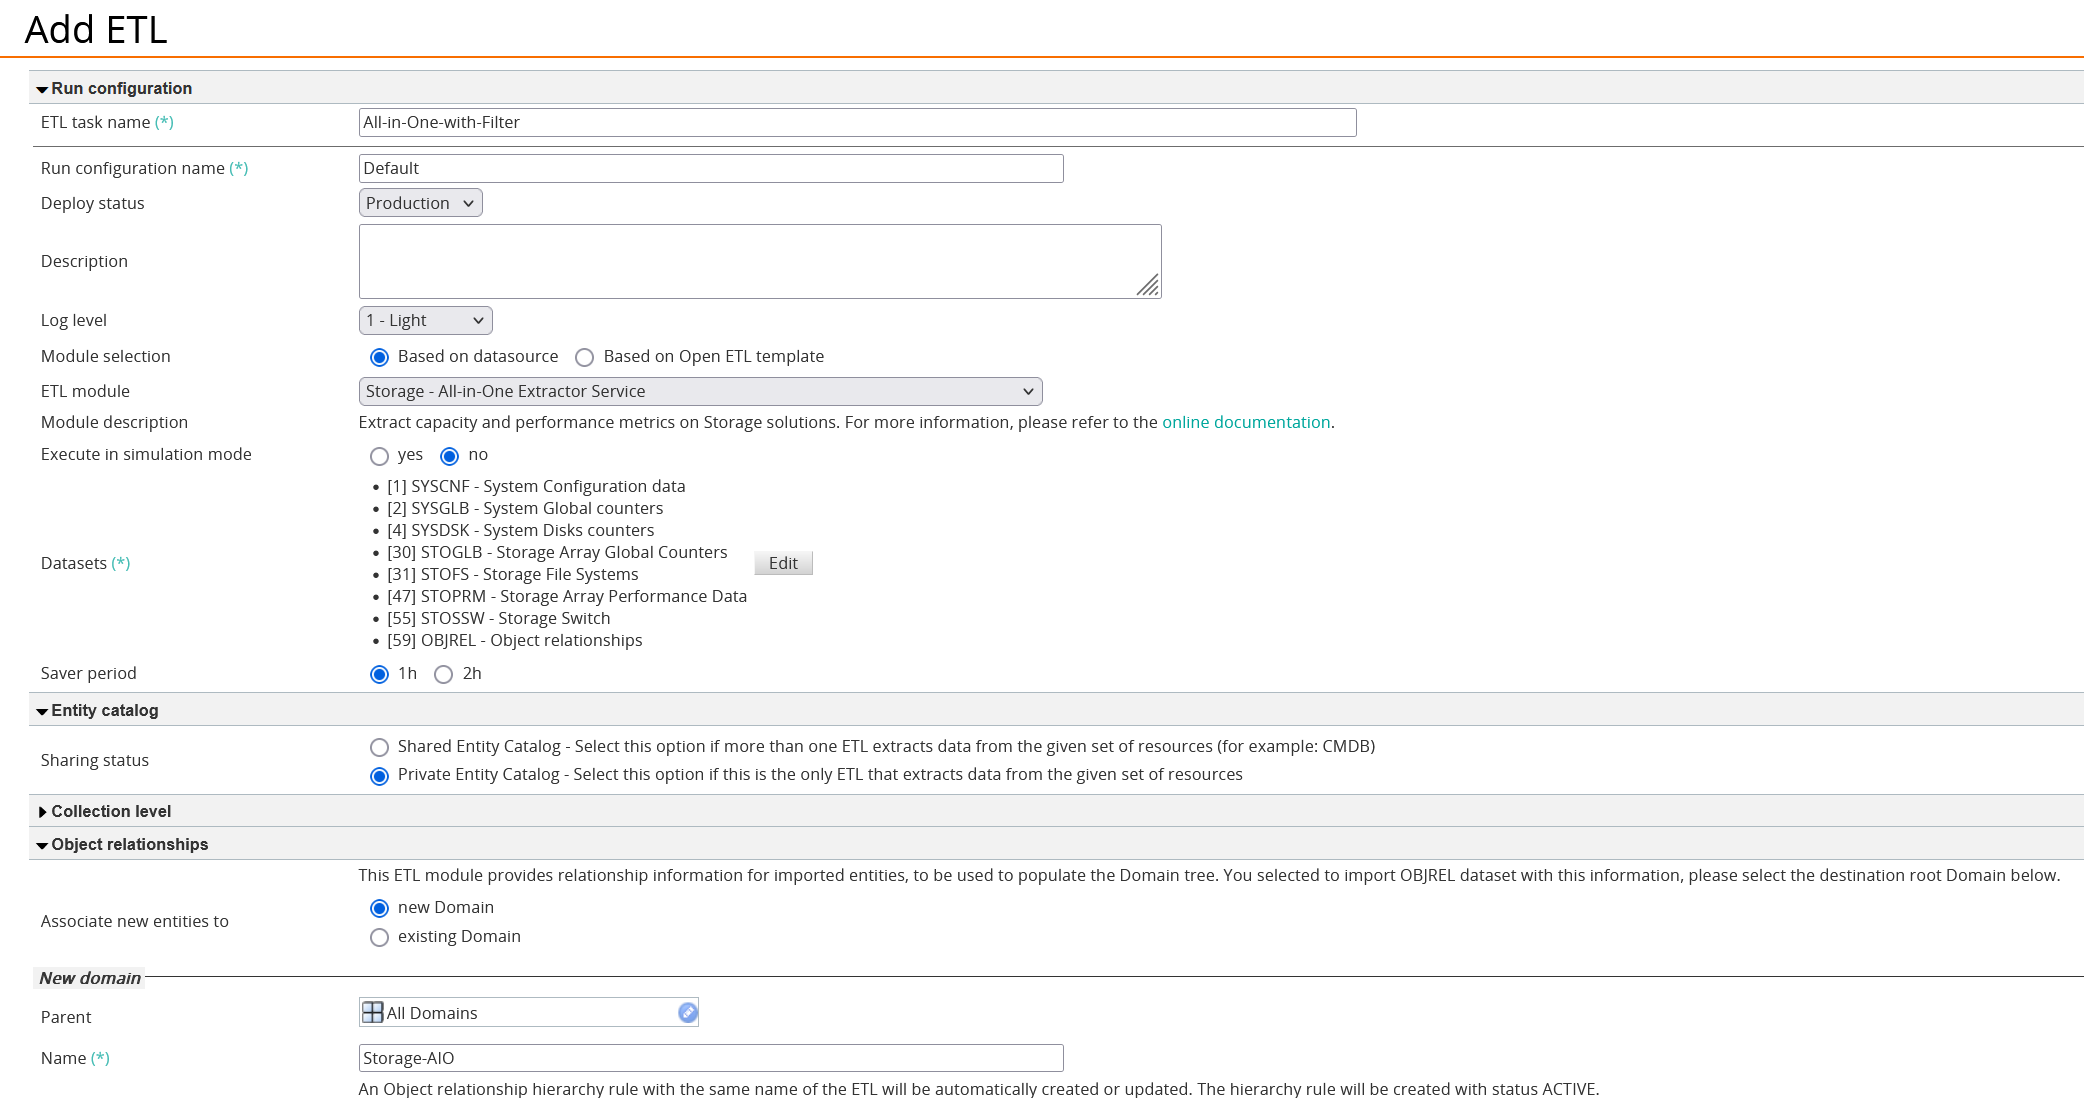
Go to Administration > ETL & SYSTEM TASKS > ETL Task page and:
- Provide the ETL task name
- Select the appropriate Deploy Status
- Keep the Log Level to 1-Light
- In the ETL Module dropdown list, select Storage All-in-One Extractor Service
- Set Execute in Simulation Mode to No
- Select the required datasets
- Select the appropriate Entity Catalog and Domain types

-
In the Connection settings section:
- From the Storage Solution dropdown list, select:
- Dell EMC MAX REST if you are using Unisphere v9.2 or older
- Dell EMC PowerMax v4 REST if you are using PowerMax v4 and/or Unisphere v10+
- Provide the hostname or IP address of your Unisphere for VMAX/PowerMax appliance
- Provide the port number (Default: 8443)
- Provide the username and password
- Select HTTPS as Transport protocol.

- From the Storage Solution dropdown list, select:
-
In the Additional properties section, add the sentry.system.filter property and specify the storage system(s) for which you wish to collect capacity information using the syntax below:
symmetrixId IN ('<symmetrixId1>';'symmetrixId2>';'...')Replace
'<symmetrixId1>';'symmetrixId2>'with the storage systems IDs obtained with the curl command.Example:
symmetrixId IN ('000297600252';'000297600253')
-
Review and save your configuration
-
Start the ETL.
Hitachi Command Suite/Configuration Manager
Retrieving system IDs
Run this curl command to retrieve the list of Hitachi storageDeviceIds:
curl -s -k -u <username>:<password> -X GET HTTPS://<hostname>:<port>/ConfigurationManager/v1/objects/storages/ | jq ".data[].storageDeviceId"
Example:
curl -s -k -u support.viewonly:****** -X GET HTTPS://hitachi-cs86:23451/ConfigurationManager/v1/objects/storages/ | jq ".data[].storageDeviceId"
Expected output:
"832000480182"

"882000453459"
Configuring the Hitachi E Series, G Series ETL
To configure a Hitachi E Series, G Series ETL
-
Go to Administration > ETL & SYSTEM TASKS > ETL Task page and:
- Provide the ETL task name
- Select the appropriate Deploy Status
- Keep the Log Level to 1-Light
- In the ETL Module dropdown list, select Storage All-in-One Extractor Service
- Set Execute in Simulation Mode to No
- Select the required datasets
- Select the appropriate Entity Catalog and Domain types

-
In the Connection settings section:
- From the Storage Solution dropdown list, select Hitachi E Series, G Series REST
- Provide the hostname or IP address of your Hitachi Command Suite/Configuration Manager
- Provide the port number (Default: 23451)
- Provide the username and password
- Select HTTPS as Transport protocol.

-
In the Additional properties section, add the sentry.system.filter property and specify the storage system(s) for which you wish to collect capacity information using the syntax below:
storageDeviceId IN ('<storageDeviceId1>';'<storageDeviceId2>';...)Replace
'<storageDeviceId1>';'<storageDeviceId2>'with the storage systems IDs obtained with the curl command.Example:
storageDeviceId IN ('882000453459')
-
Review and save your configuration
-
Start the ETL.
NetApp ActiveIQ Unified Manager
Retrieving cluster names
Run this curl command to retrieve the list of NetApp clusters:
curl -s -k -H "Content-Type: application/json" -H "Accept: application/json" -u <username>:<password> -X GET https://<hostname>:<port>/api/datacenter/cluster/clusters | jq ".records[].name"
Example:
curl -s -k -H "Content-Type: application/json" -H "Accept: application/json" -u sam-RO:****** -X GET https://10.0.16.179/api/datacenter/cluster/clusters | jq ".records[].name"
Expected output:
"netapp-aff"
"netapp9-san"
"netapp2-san"
Configuring the NetApp AIQIUM ETL
To configure an NetApp AIQIUM ETL
-
Go to Administration > ETL & SYSTEM TASKS > ETL Task page and:
- Provide the ETL task name
- Select the appropriate Deploy Status
- Keep the Log Level to 1-Light
- In the ETL Module dropdown list, select Storage All-in-One Extractor Service
- Set Execute in Simulation Mode to No
- Select the required datasets
- Select the appropriate Entity Catalog and Domain types

-
In the Connection settings section:
- From the Storage Solution dropdown list, select NetApp AIQIUM REST
- Provide the hostname or IP address of your NetApp AIQIUM system
- Provide the port number (Default: 443)
- Provide the username and password
- Select HTTPS as Transport protocol.

-
In the Additional properties section, add the sentry.system.filter property and specify the cluster(s) for which you wish to collect capacity information using the syntax below:
ClusterName IN ('<ClusterName1>';'<ClusterName2>';...)Replace
'<ClusterName1>';'<ClusterName2>'with the cluster names obtained with the curl command.Example:
ClusterName IN ('netapp-aff';'netapp9-san')
-
Review and save your configuration
-
Start the ETL.
Related Topics
- CIM_ERR_FAILED Errors Occur When Running EMC WBEM-Based ETLs with Java v11.0.15 or Newer
- No data collected for HPE XP7/XP8 storage systems in TrueSight Capacity Optimization or TrueSight Operations Management
- Storage All-in-One ETL: DISCOVERY Service Iteration Fails When Upgrading to v1.4.00
- How to Monitor Dell EMC Unity Storage Systems with Storage Analyzer KM
- How to Monitor Hitachi E and G Series Storage Systems with Storage Analyzer KM
