Introduction
The Sentry Professional Services team has made available on GitHub free templates for Monitoring Studio X to monitor:
These templates are provided as an example and can be used as a working base for advanced monitoring.
In this article, you will learn how to:
- import these templates in Monitoring Studio X
- test the configuration against your monitored host
- import your configuration into a CMA policy.
Please note that no support is provided for these free templates. For further assistance, please contact Sentry Professional Services.
Prerequisites
Before monitoring your SharePoint environment in Monitoring Studio X, you need to install:
- the latest version of the PATROL Agent
- Java 8 or higher
- Monitoring Studio X.
They can be installed on a server different than your SharePoint server.
Procedure
Step 1: Importing the Microsoft SharePoint template in Monitoring Studio X
-
Download the template appropriate for your Microsoft SharePoint installation:
-
Import the template in Monitoring Studio X:
- In your Web browser, enter
https://<patrol-agent>:<patrol-agent-port+262>/where:<patrol-agent>should be replaced by the name of the host on which the PATROL Agent runs<patrol-agent-port+262>should be replaced by the number you obtain when you add 262 to the PATROL Agent port number (example:https://xdemo:3443)
- Go to the Studio tab and click IMPORT TEMPLATE
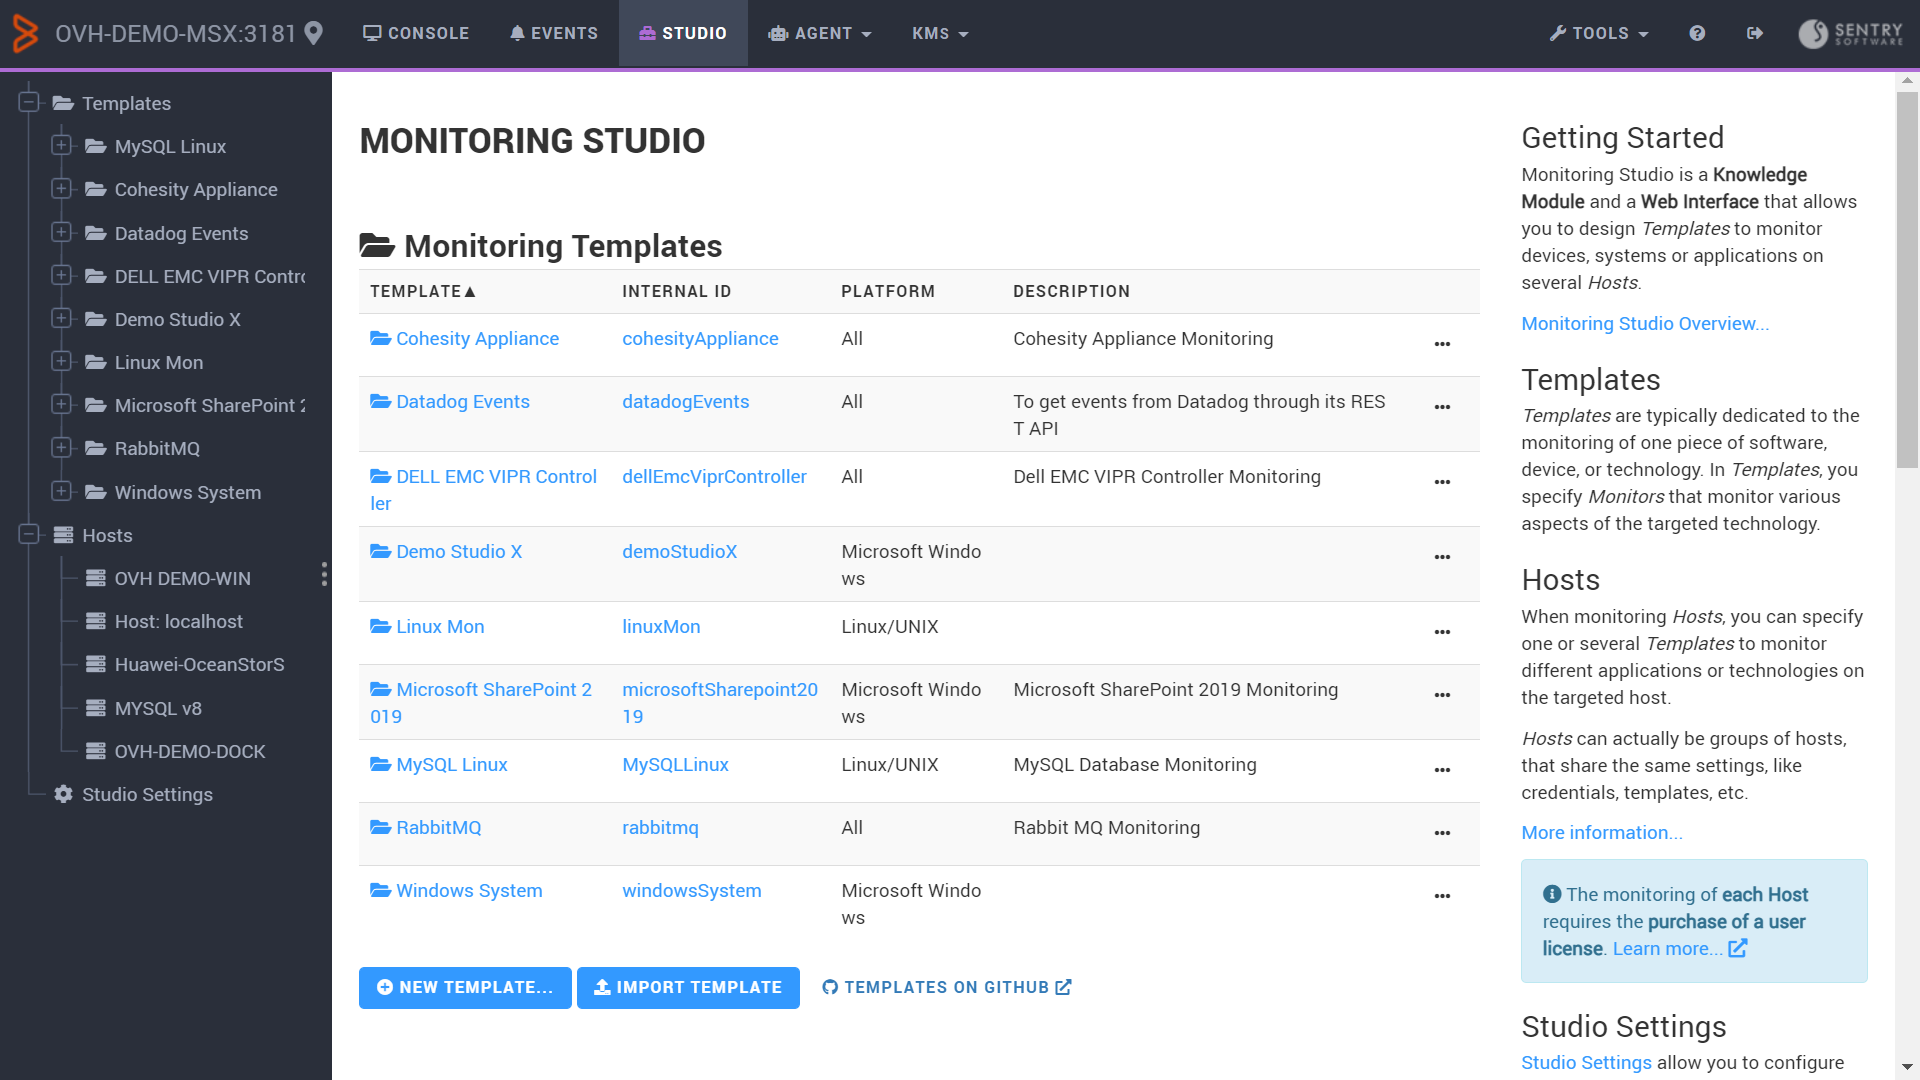
- Browse for the template you previously downloaded from GitHub (
SharePoint.cfgfor example). The template is then listed in the Monitoring Templates section:
- In your Web browser, enter
-
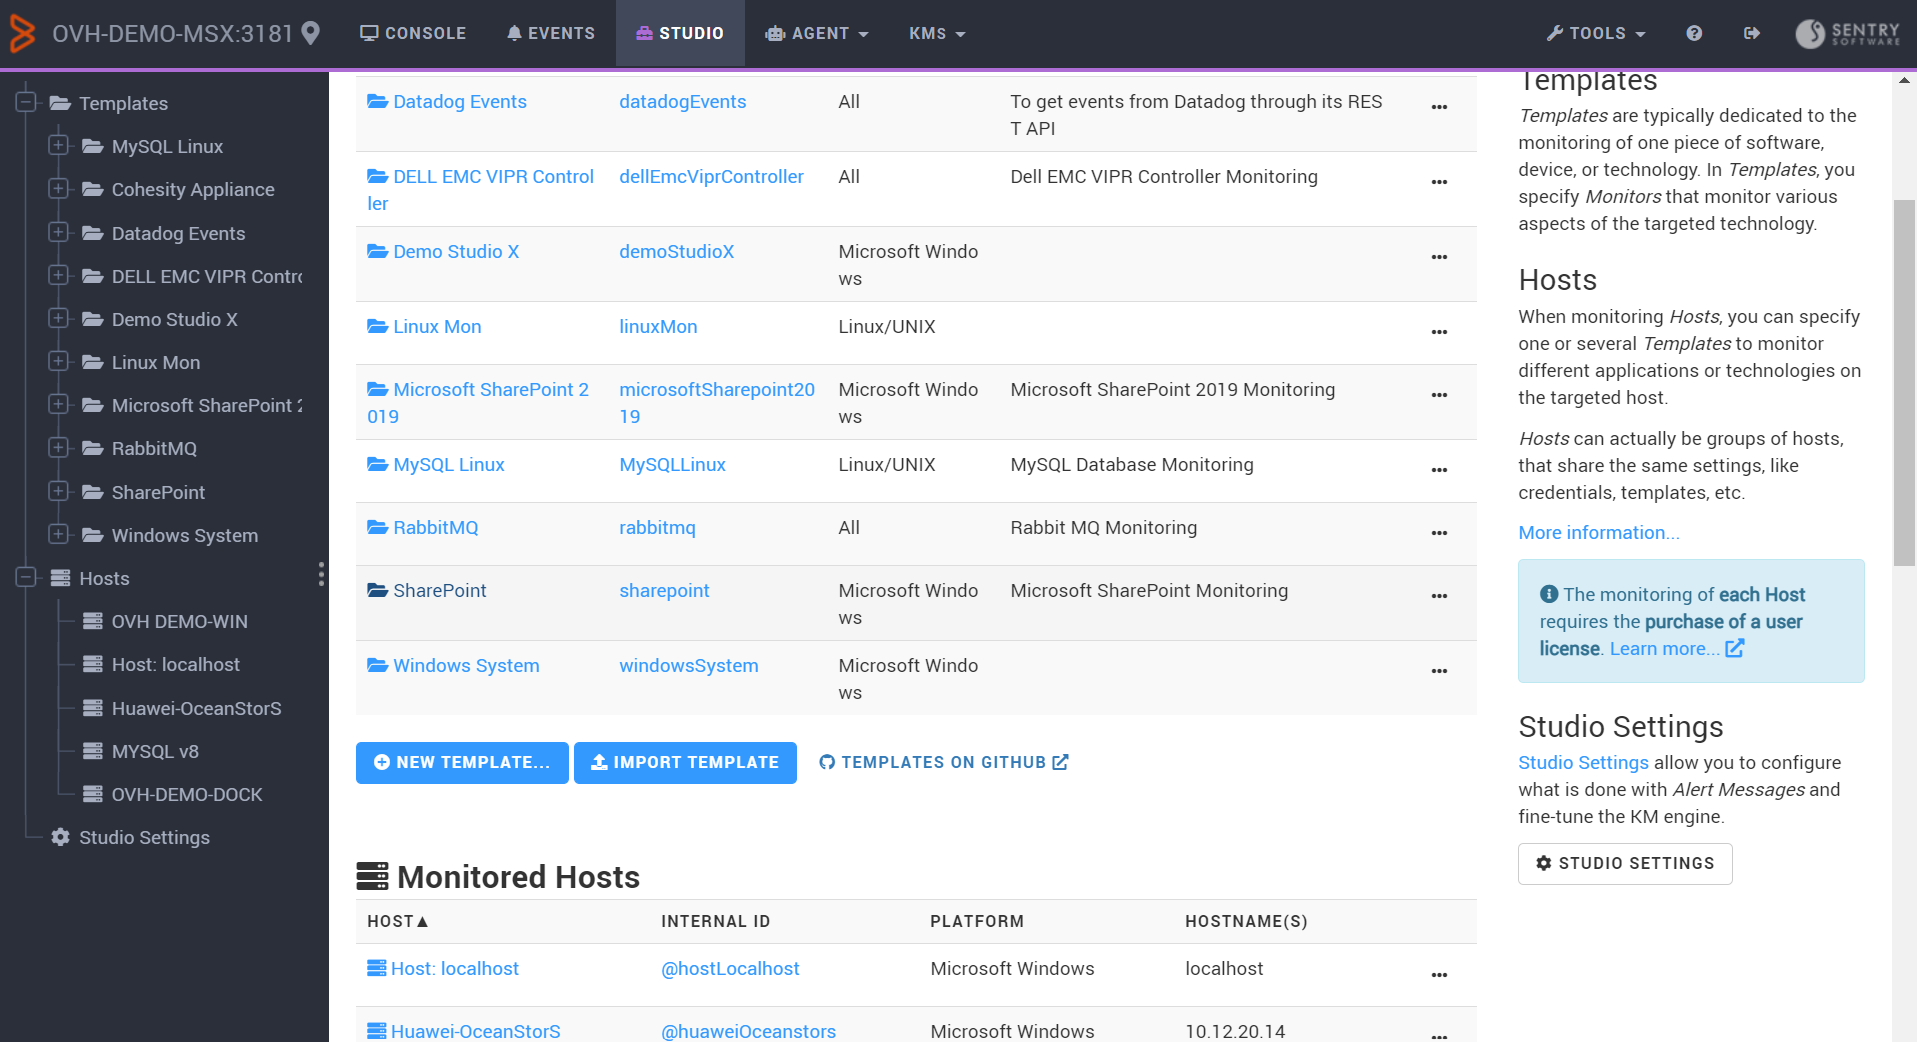
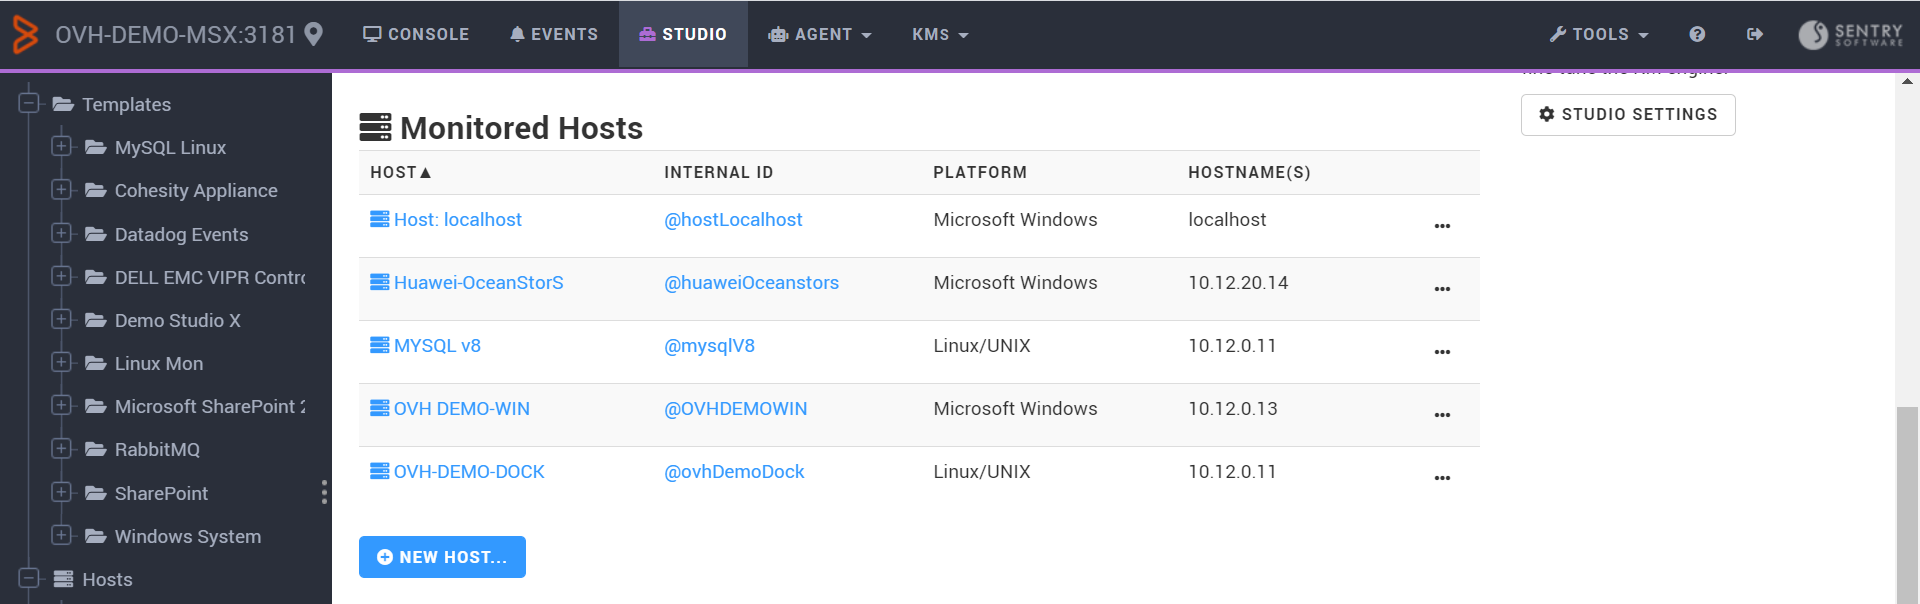
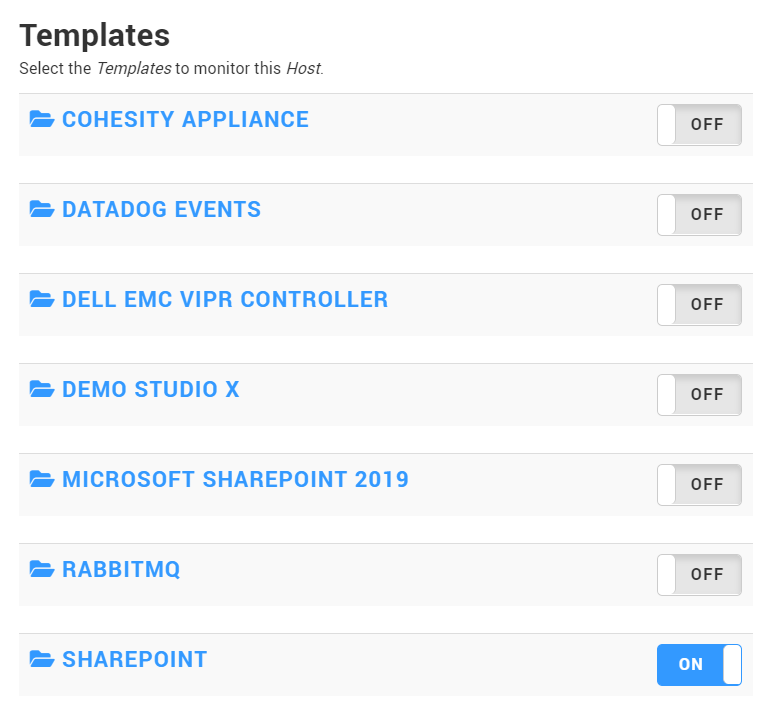
Create the host to be monitored:
- In the Monitored Hosts section, click NEW HOST…
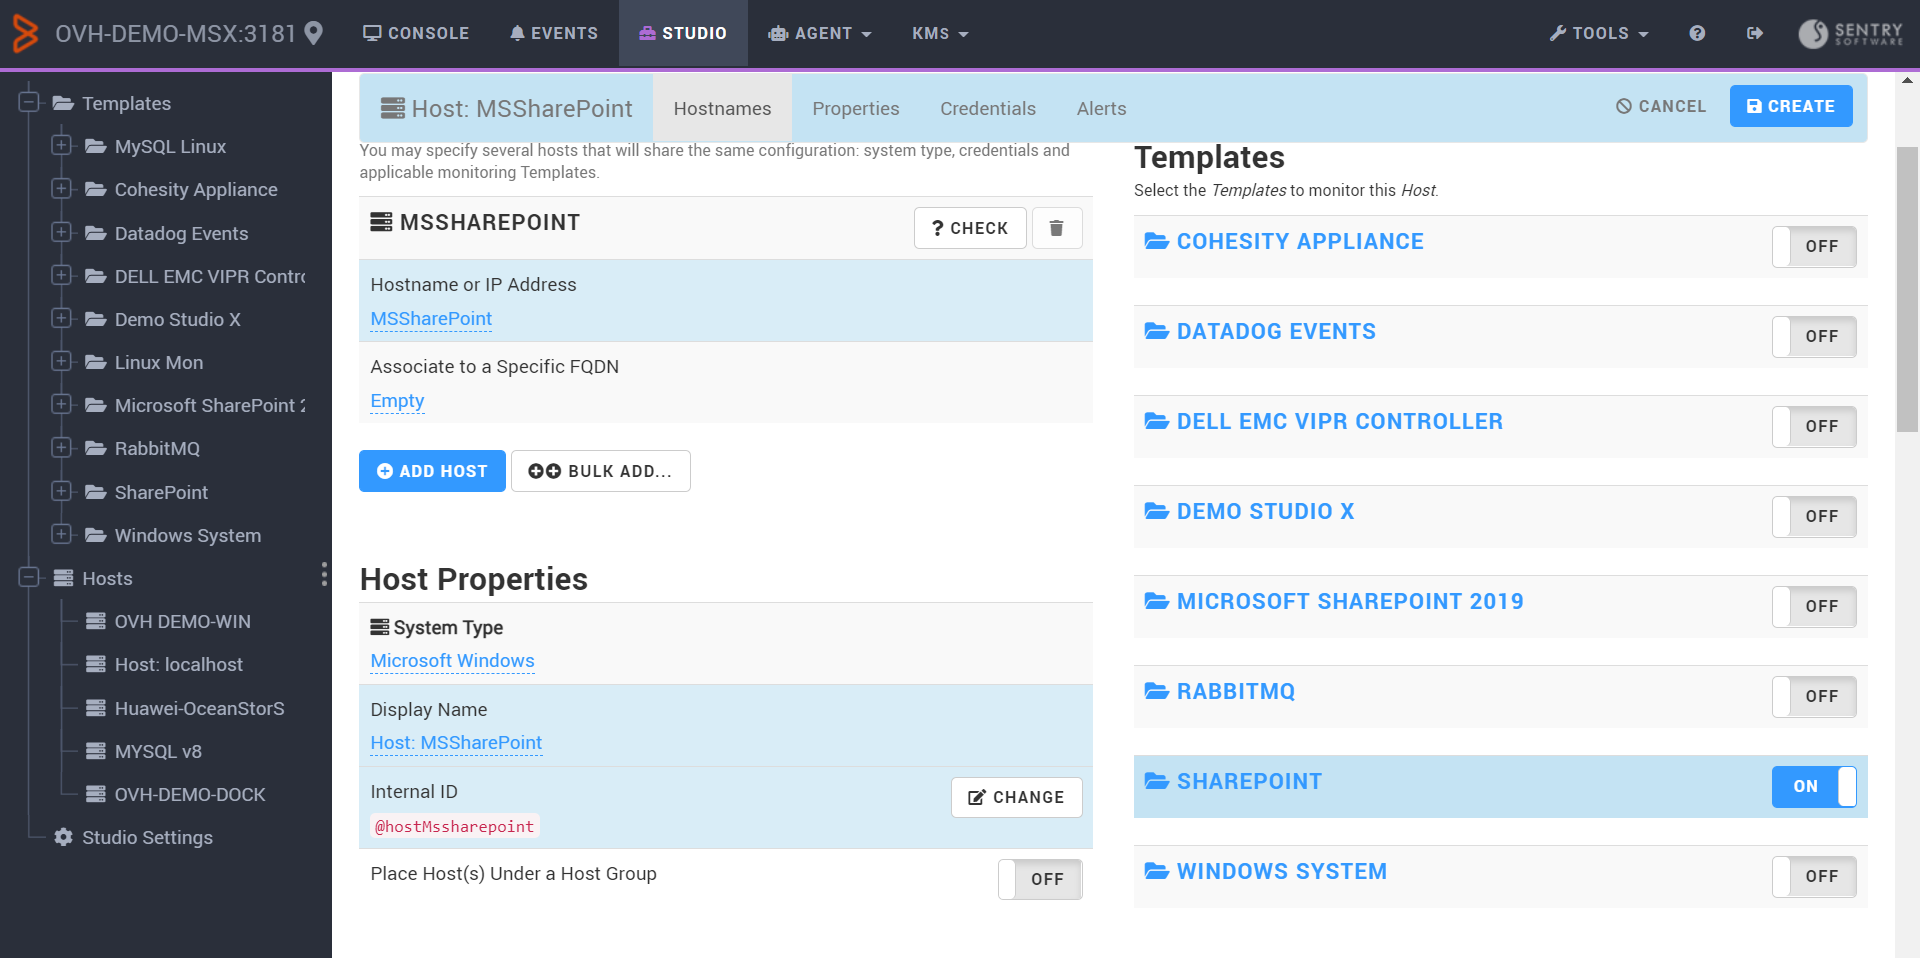
- Enter the Hostname or IP Address of the SharePoint server to be monitored
- Provide the Credentials to be used to connect to the SharePoint server
- Enable the SHAREPOINT template
- Click CREATE
Step 2: Testing the configuration against the monitored host
Once the SharePoint template has been imported and the host to be monitored created, test each Monitor against your host to ensure the template meets your environment needs:
-
In the Monitoring Studio X Web Interface, go to the Studio tab
-
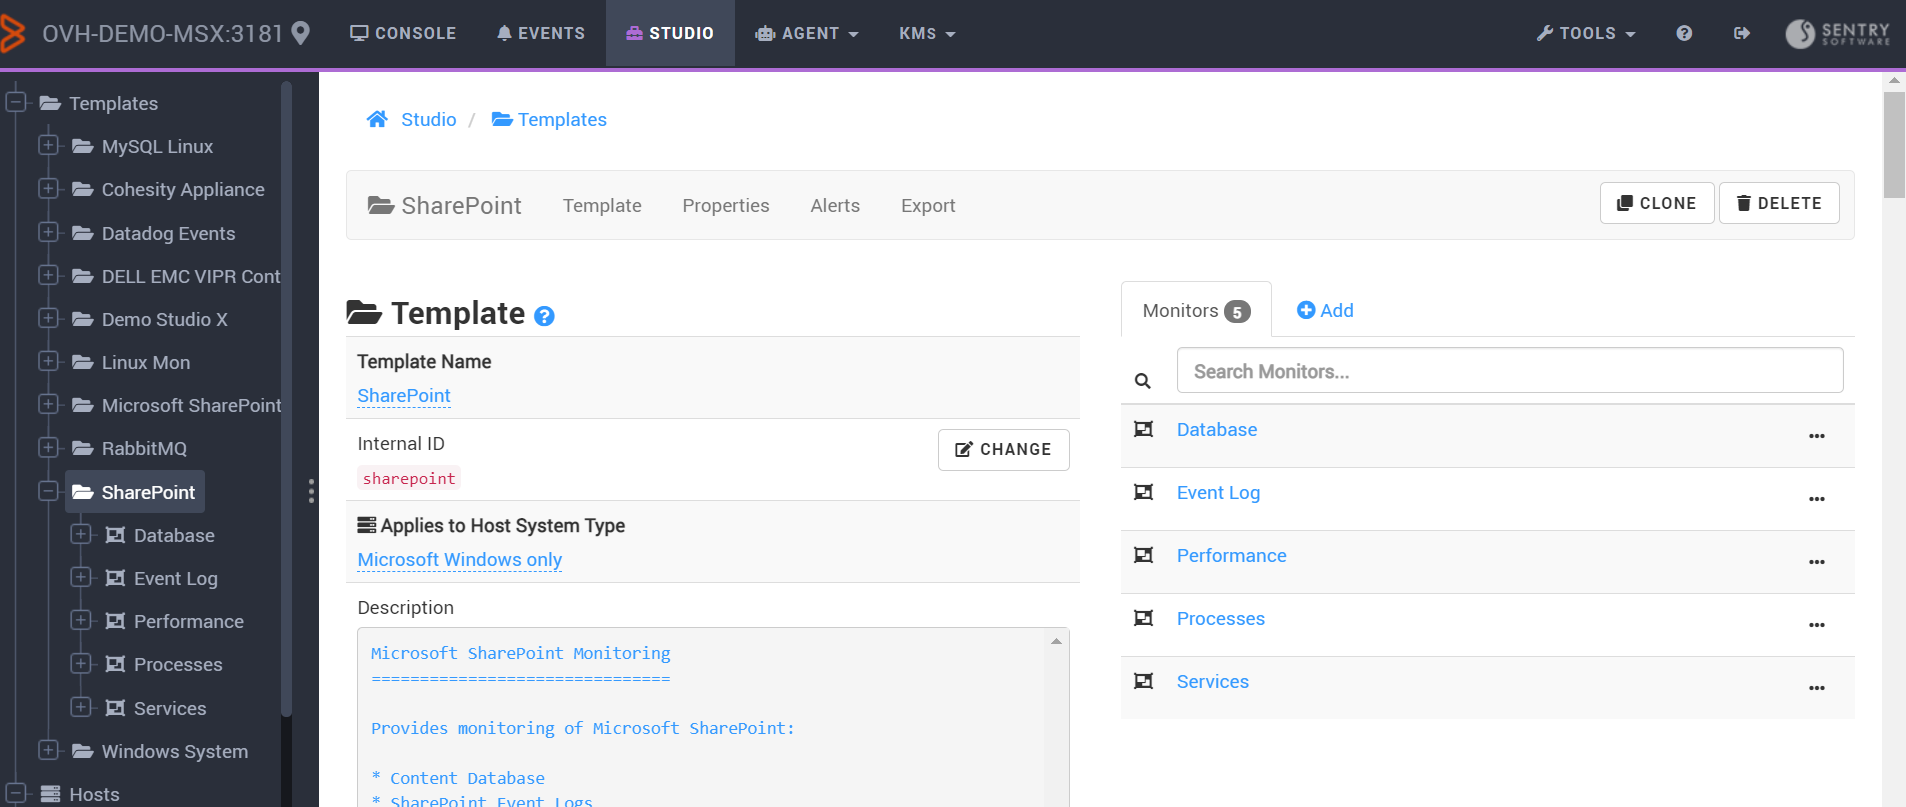
Click the SharePoint template
-
Go through the different Monitors. Click for example Database > Content Database
-
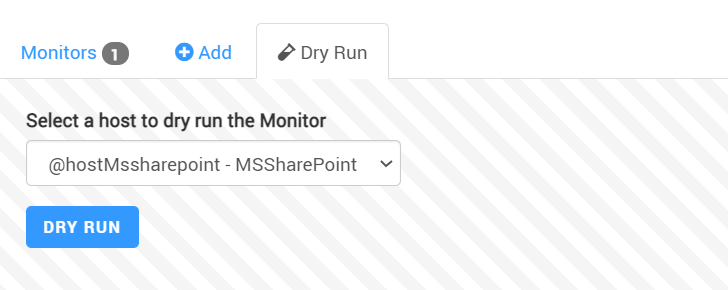
In the Dry Run tab, select the host you previously created and click Dry Run
-
Check the Dry Run results. If problems are detected, make the needed adjustments. If you need assistance at this step, please contact Sentry Professional Services.
You can now monitor your SharePoint environment through the Console tab of the Monitoring Studio X Web Interface. To monitor your environment in TrueSight Presentation Server as well, you need to import your customized template in TrueSight.
Step 3: Importing your customized template in TrueSight
To import your customized template in TrueSight:
-
From the Monitoring Studio X Web interface:
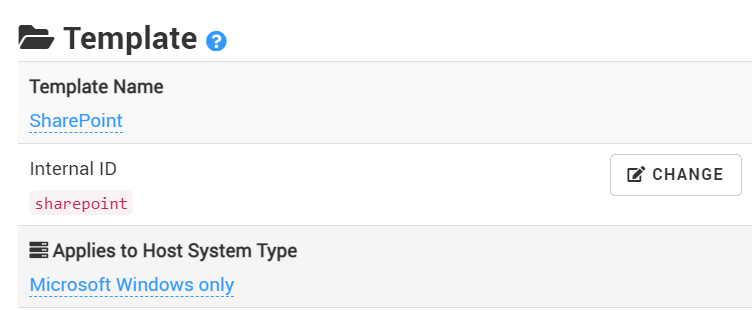
- In the Studio tab, click the SharePoint template you customized
- Note down the Internal ID (
sharepointin our example)
- Go to the Export to TrueSight section:
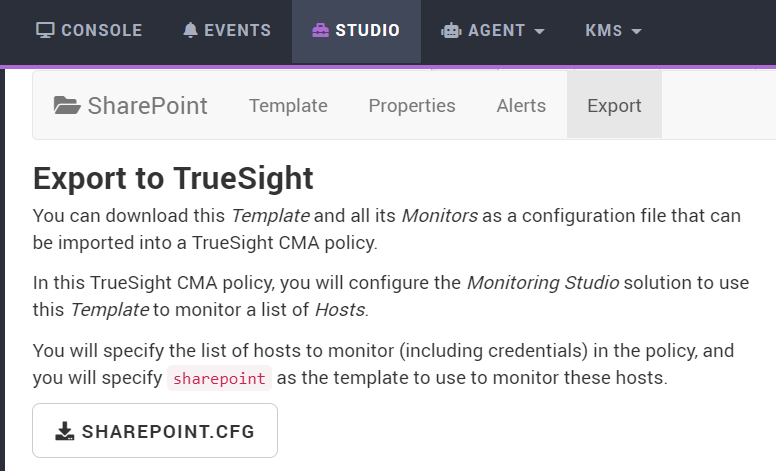
- Click the download button
-
Log in to TrueSight Presentation Server:
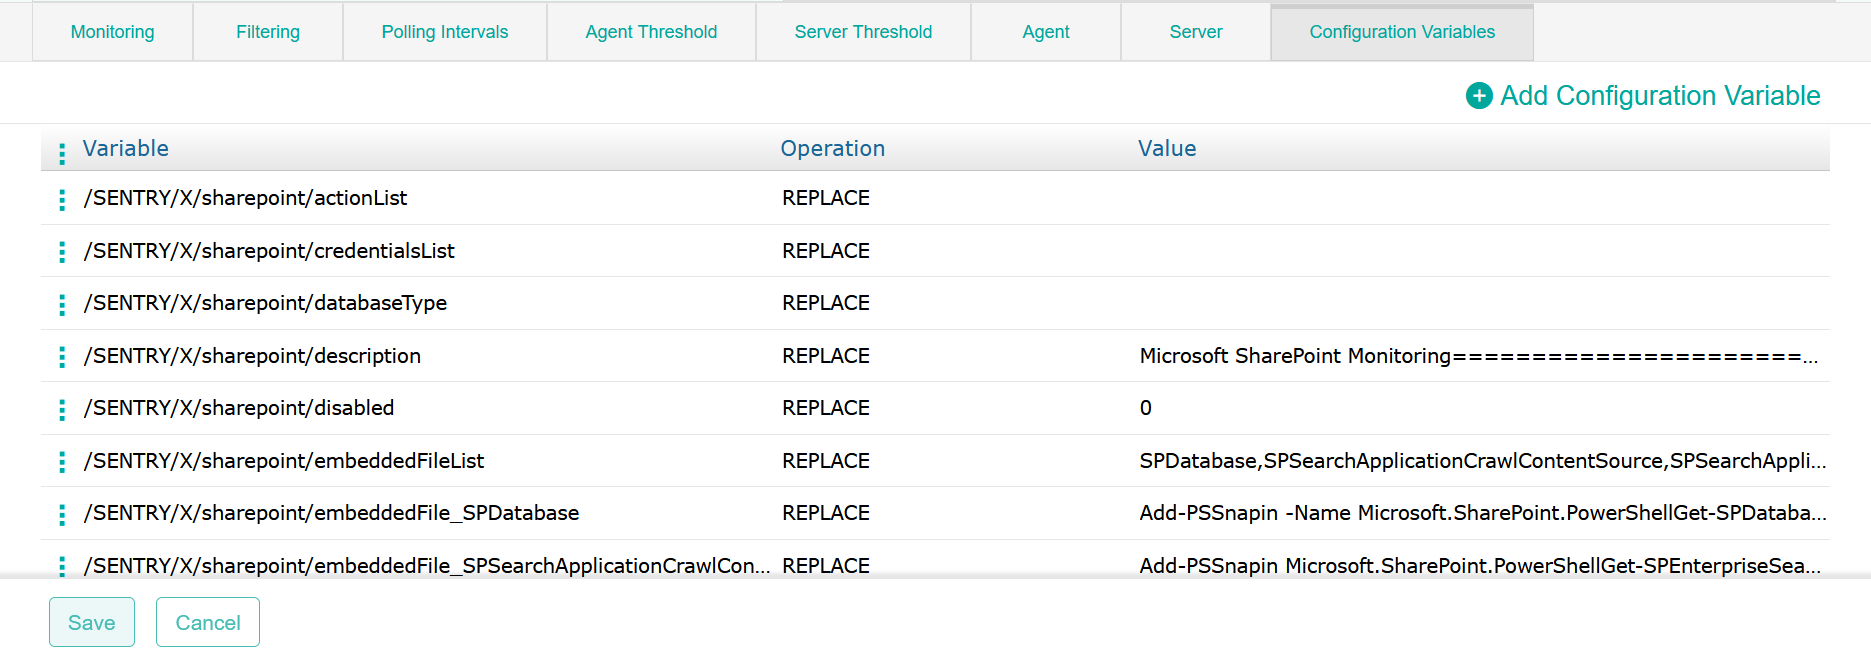
- Create a Policy. In the Configuration Variables tab, click the action button and select Import

- Locate the template to import and click Open
- Verify the configuration values, change them if required and click Save
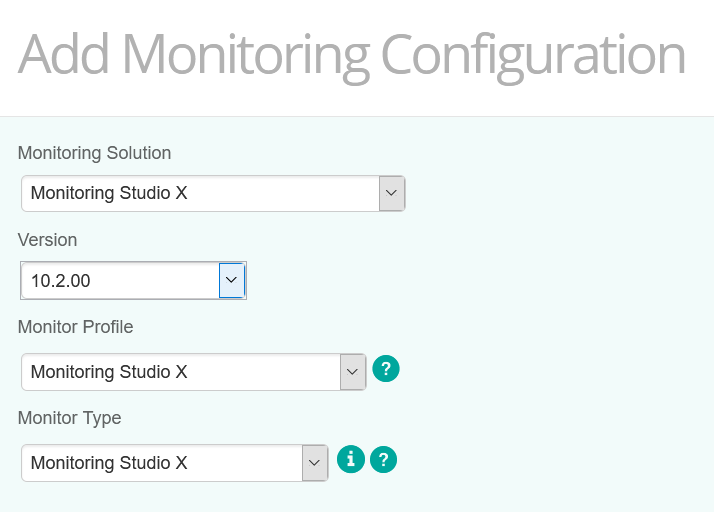
- In the Monitoring tab, click Add Monitoring Configuration and select Monitoring Studio X
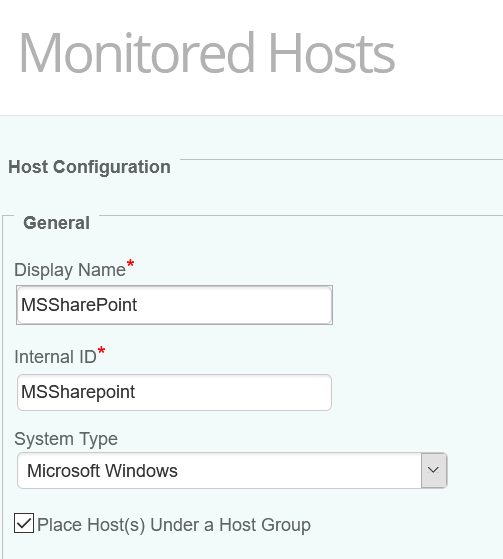
- Configure the Host
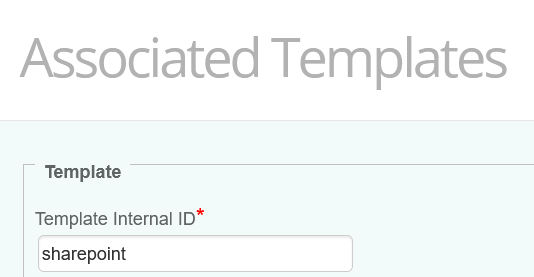
- Scroll down to the Templates section to add an associated template. Provide the Internal ID of the Template (
sharepointin our example).
- Configure the required settings and click OK
- Save the policy. The Template and all its properties are imported to the policy and ready to use.
Related Topics
- Monitoring SharePoint 2013 and 2016 using Monitoring Studio v8 or v9
- Monitoring Studio X: HTTP Proxy Authentication Fails When Using Java 8 Update 111 or Later
- Monitoring Studio X Unexpectedly Hangs or Consumes High CPU When Running a JRE Higher Than 8
- Identifying and Locating Storage Devices in BMC Helix Operations Management
- How to display the HTTP Status parameter in Monitoring Studio X