Introduction
Hitachi disk arrays can be monitored with Hitachi Disk Arrays KM for PATROL and/or Hardware Sentry KM for PATROL, and Storage Analyzer KM. While the Hitachi Disk Arrays KM and the Storage Analyzer KM provide performance and capacity metrics, Hardware Sentry monitors the hardware health of the disk arrays.
The following Hitachi disk arrays can be monitored with Hitachi Disk Arrays KM for PATROL, Hardware Sentry KM for PATROL, and the Storage Analyzer KM:
| Hitachi Platforms | Hitachi Disk Arrays KM | Hardware Sentry KM | Storage Analyzer KM |
|---|---|---|---|
| Hitachi Adaptable Modular Storage 2000 family (AMS) | |||
| Hitachi Unified Storage (HUS, HUS VM) | |||
| Hitachi Universal Storage Platform (USP-V/USP-VM) | |||
| HP P9000 | |||
| Hitachi Universal Storage Platform (USP) | |||
| Hitachi Virtual Storage Platform | |||
| Hitachi Gxxxx series | |||
| Hitachi HNAS |
This article explains how to configure these KMs to monitor your Hitachi disk arrays.
Pre-requisites
The prerequisites will differ depending on the platform to be monitored.
For Hitachi AMS, HUS, USP, VSP, and HP P9000
Hitachi Disk Arrays KM for PATROL leverages the Hitachi Device Manager to collect capacity and performance metrics about the Hitachi AMS, HUS, HUS-VM, USP, VSP, and HP P9000 platforms.
To monitor these platforms, you will have to:
For Hitachi HUS-VM, and VSP Gxxxx Series
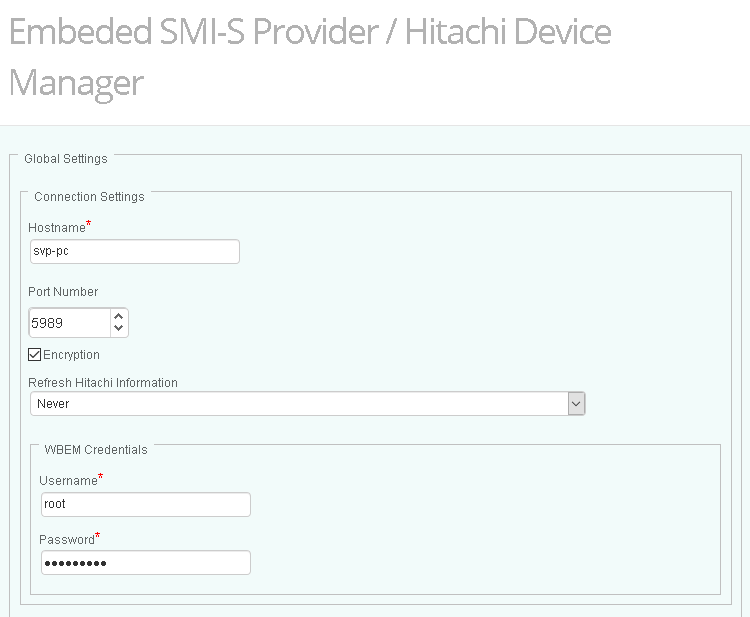
Hitachi HUS-VM and VSP Gxxxx Series come with an embedded SMI-S provider that can be leveraged by the Sentry’s KMs. To monitor these series, you need to:
- Start the embedded SMI-S provider
- Create a user with a “storage administrator View-only” role
- Enable Statistics.
Starting the Embedded SMI-S Provider
To start the embedded SMI-S Provider:
-
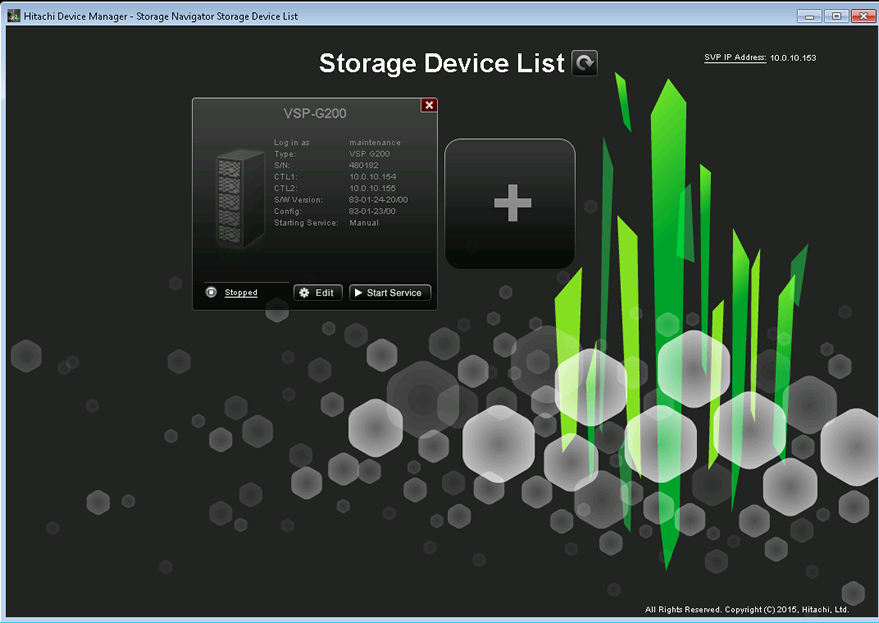
Click Start > All Programs > Hitachi Device Manager - Storage Navigator > StorageDeviceList
-
Click Start Service
-
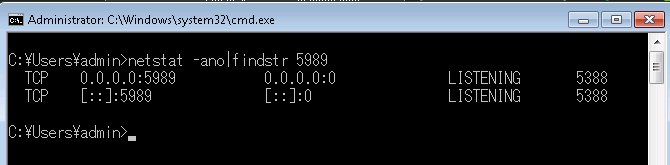
Run the netstat -ano|findstr 5989 command to verify that a process is actually listening on port 5989.
Creating a User with the “storage administrator View-only” Role
To create a user with the “storage administrator View-only” role:
-
Log on to the Hitachi Device Manager - Storage Navigator console
-
In the left pane, click Administration > Storage Administrator (View Only) User Group
-
In the right pane, select the Users tab and click Create User

-
Enter the required information and click Finish.
Enabling Statistics
Statistics need to be enabled to allow Hitachi Disk Arrays KM for PATROL to collect hardware and performance metrics. The procedure is as follows:
-
Log on to the Hitachi Storage Navigator Modular console with the administrator’s account.
-
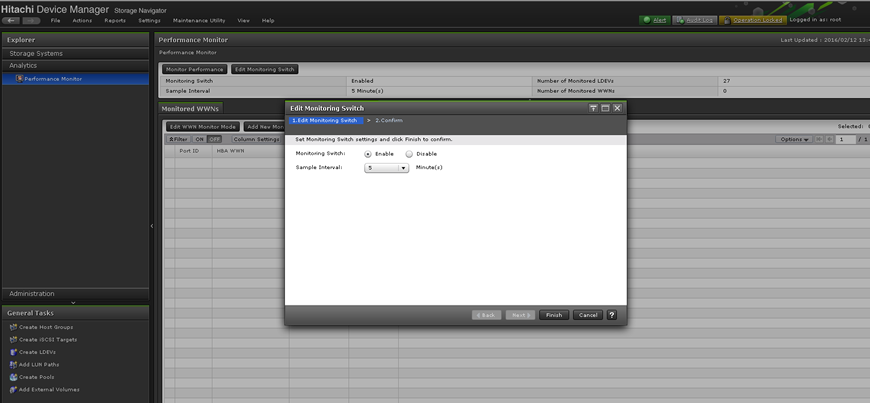
In the left pane, click Analytics > Performance Monitor
-
Click Edit Monitoring Switch
-
In the Edit Monitoring Switch window, select Enable and click Finish.
Testing the Connection to the Hitachi Device Manager or the Embedded SMI-S Provider
Before configuring Sentry’s KMs, it is important to test the connection to the Hitachi Device Manager/SMI-S provider with the Sentry’s troubleshooting tool and therefore validate your Hitachi Device Manager/SMI-S provider configuration. Please refer to the Troubleshooting Connectivity Issues article to know how to use this specific tool.
Using Hardware Sentry
Hardware Sentry can either be configured in Monitoring Studio X or in TrueSight Presentation Server.
Configuring Hardware Sentry in Monitoring Studio X
To configure the monitoring of your Hitachi disk arrays in Monitoring Studio X:
- Make sure Hardware Sentry v10.2.00 or higher and Monitoring Studio X are installed on the same machine
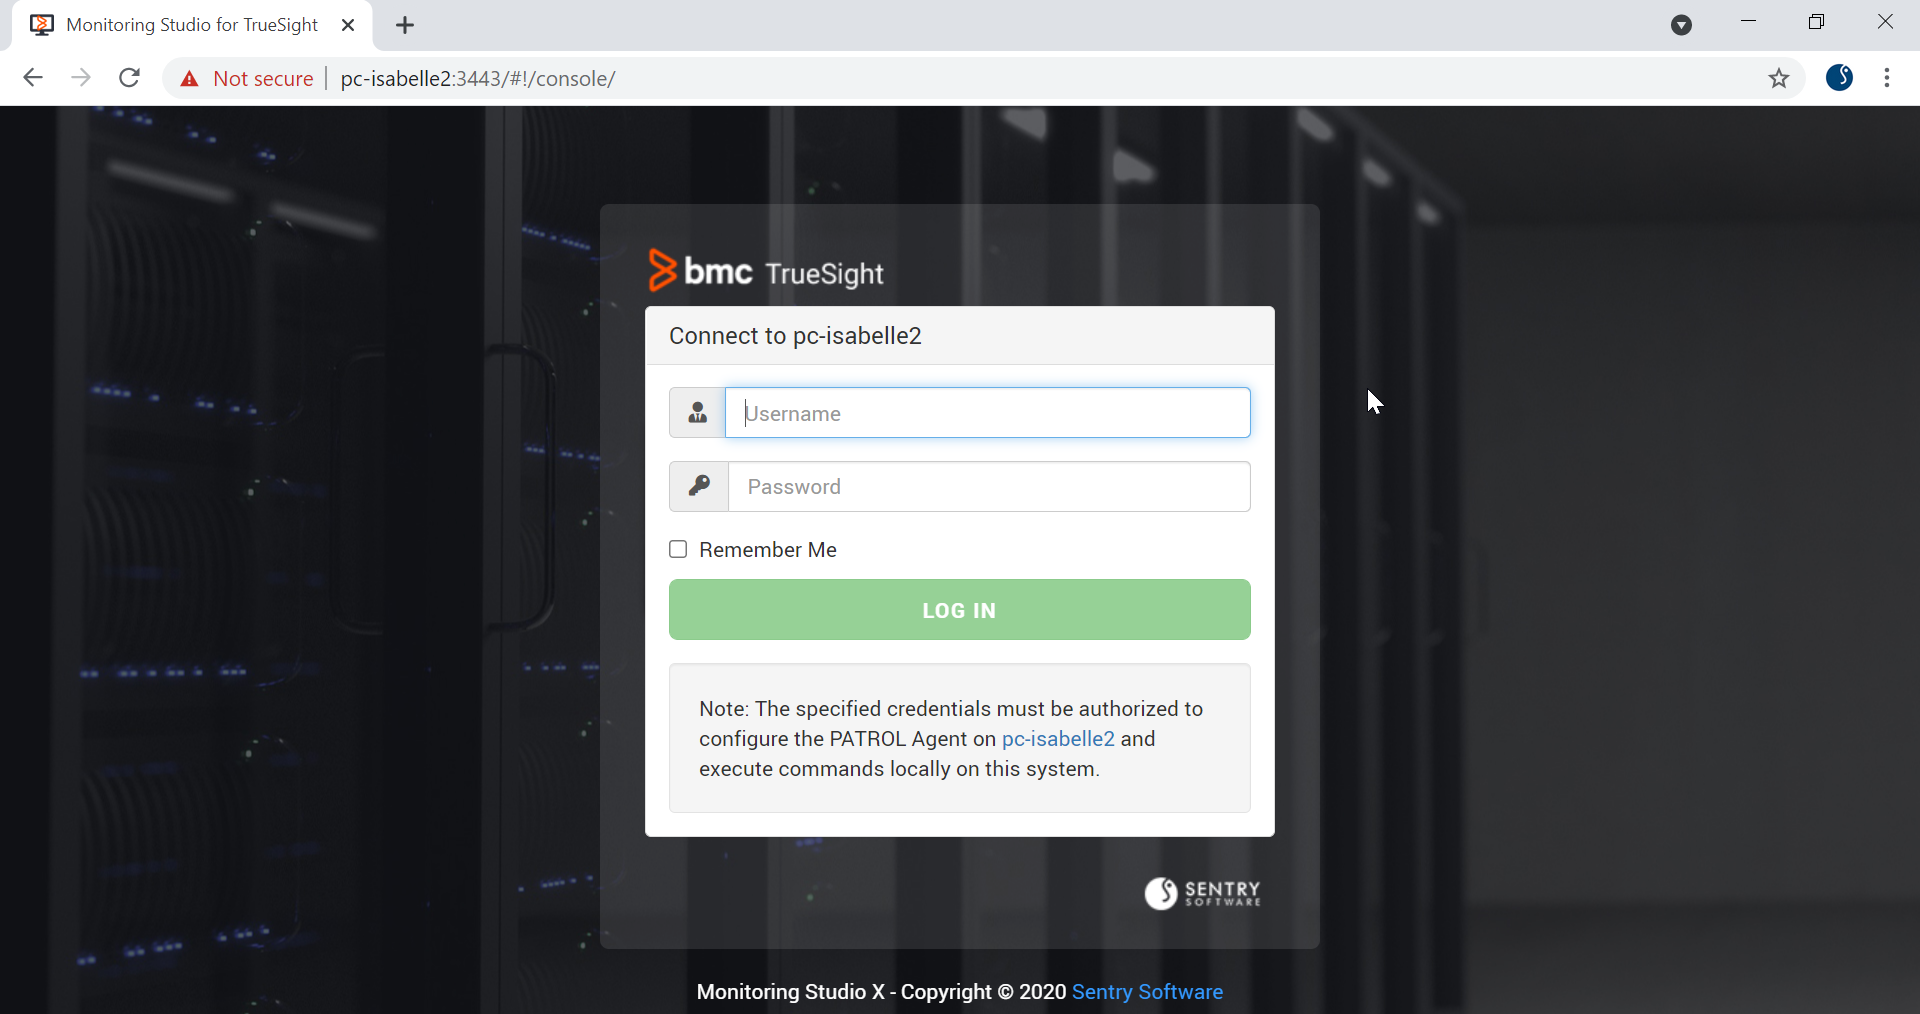
- Log in to the Monitoring Studio X Web interface
- Go to KMs > Hardware Sentry
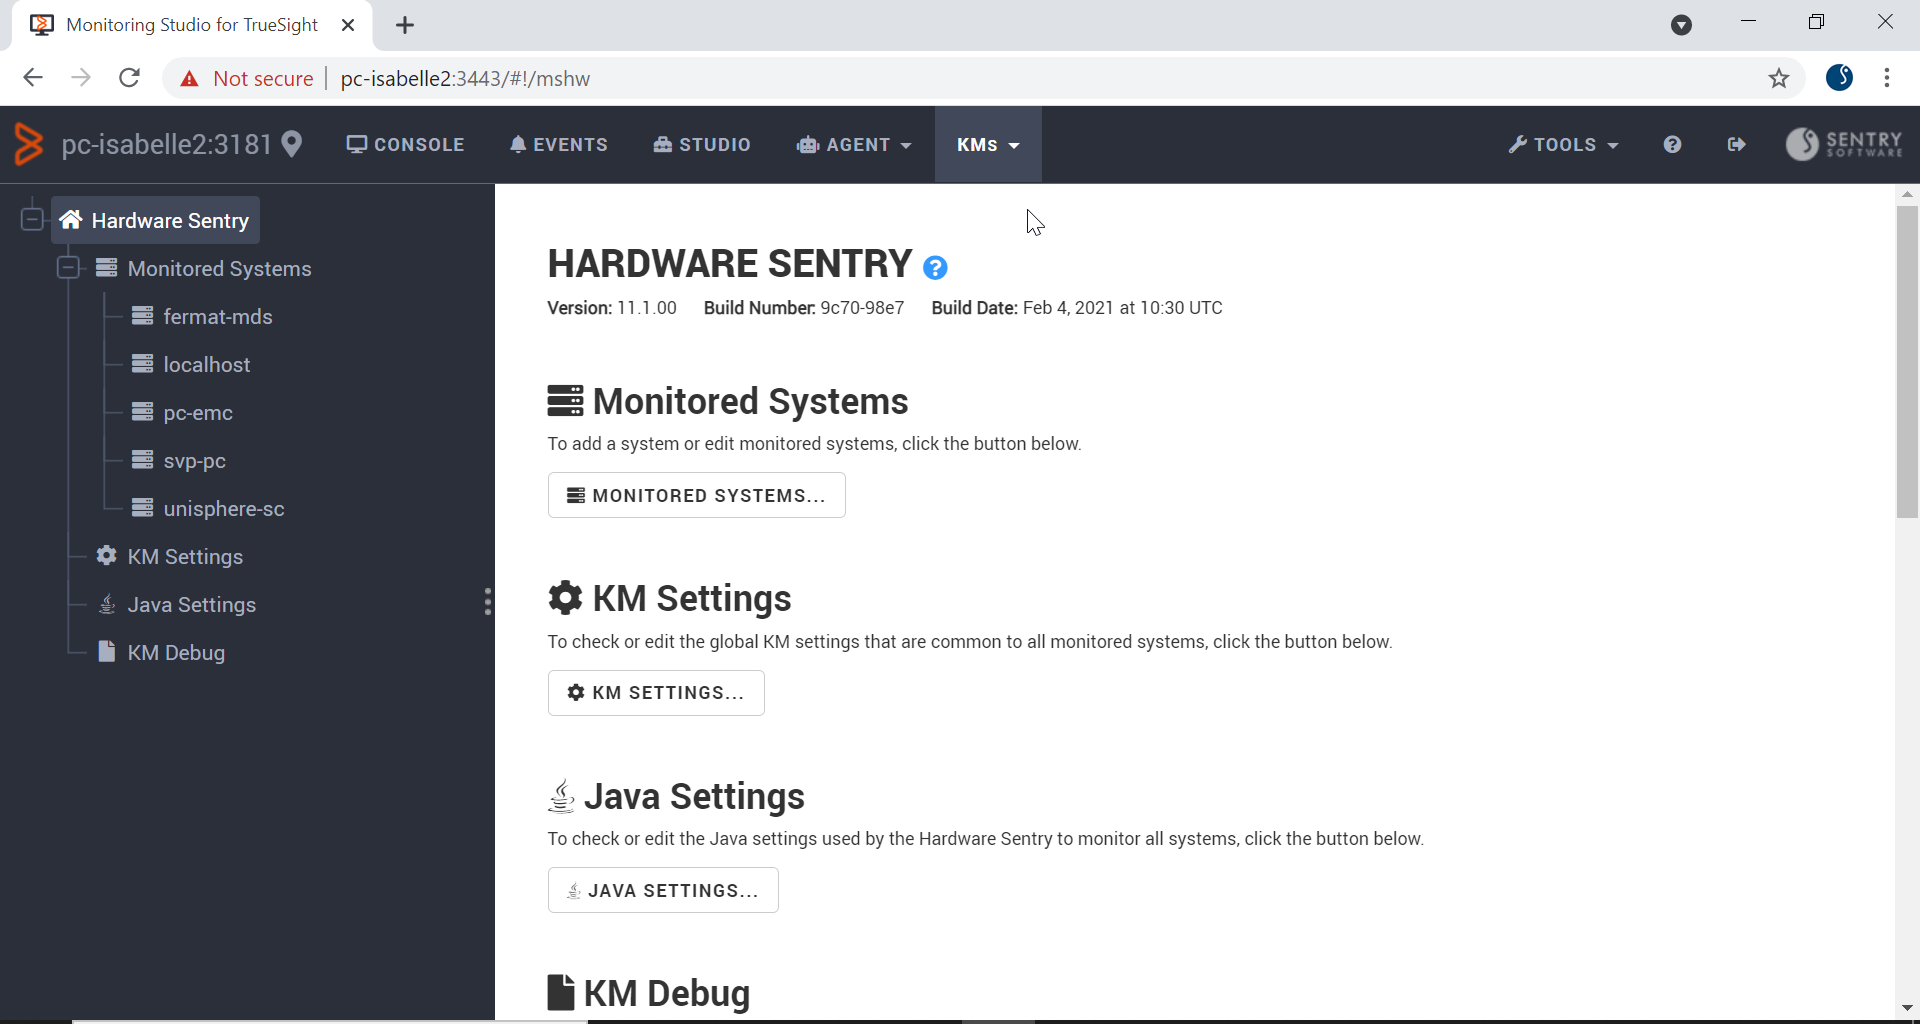
- Click Monitored Systems… > New System…
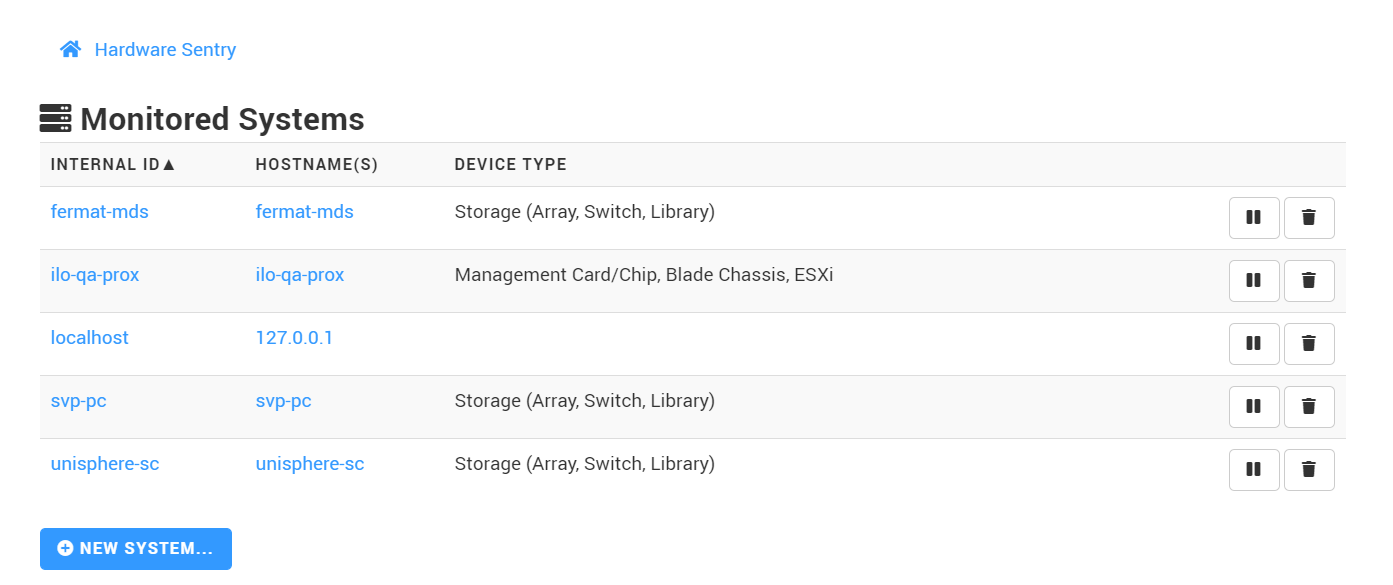
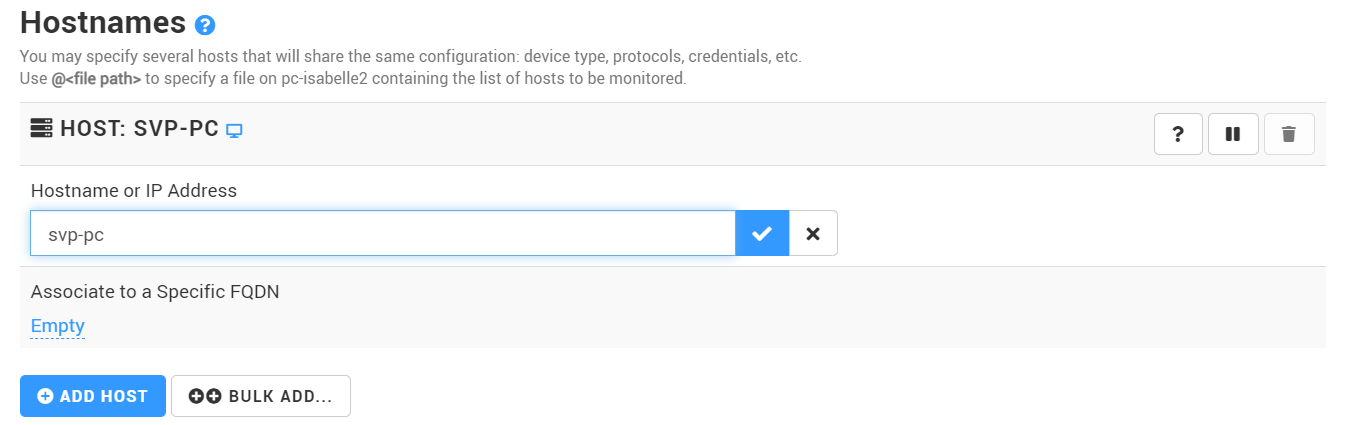
- Enter the hostname or IP address of the Hitachi disk array to be monitored
- Refer to the table below to know which protocol should be used to monitor your platform:
| Hitachi Platform | Technology/Protocol | Connector File Name |
|---|---|---|
| Hitachi AMS, HUS | System Commands | (Linux) MS_HW_HitachiSNM2CLILinux.hdf, (Windows) MS_HW_HitachiSNM2CLINT.hdf |
| Hitachi AMS, HUS, USP, VSP | WBEM | MS_HW_HitachiDiskArray.hdf |
| Hitachi HNAS | SNMP | MS_HW_HitachiHNAS.hdf |
| Hitachi USP, VSP | SNMP | MS_HW_HitachiVSPSNMP.hdf |
| Hitachi VSP G Series, Hitachi HUS-VM | WBEM | MS_HW_HitachiVSPDiskArray.hdf |
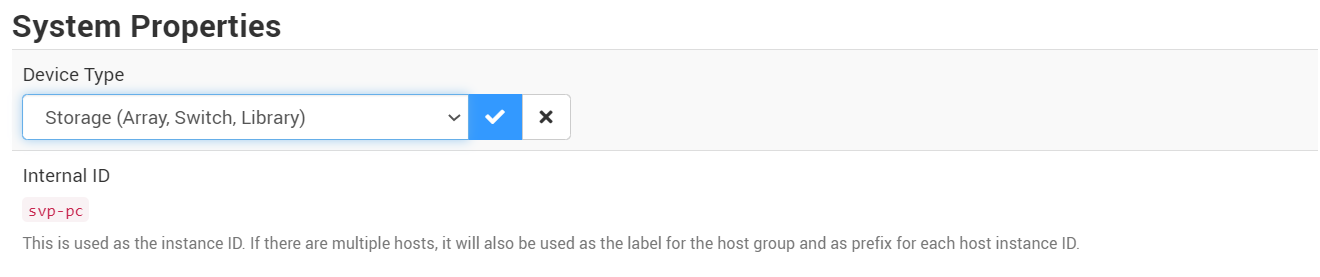
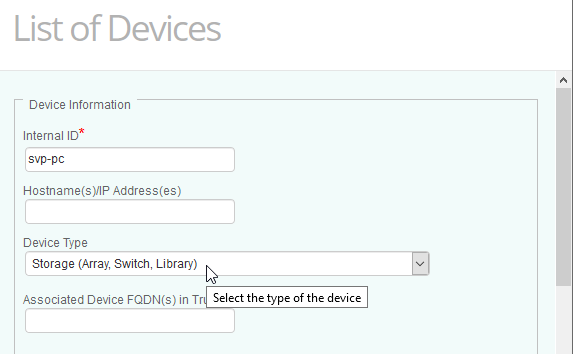
- In the System Properties section, select Storage (Array, Switch, Library)
-
In the Protocols section, enable:
- SSH to monitor Hitachi AMS and HUS
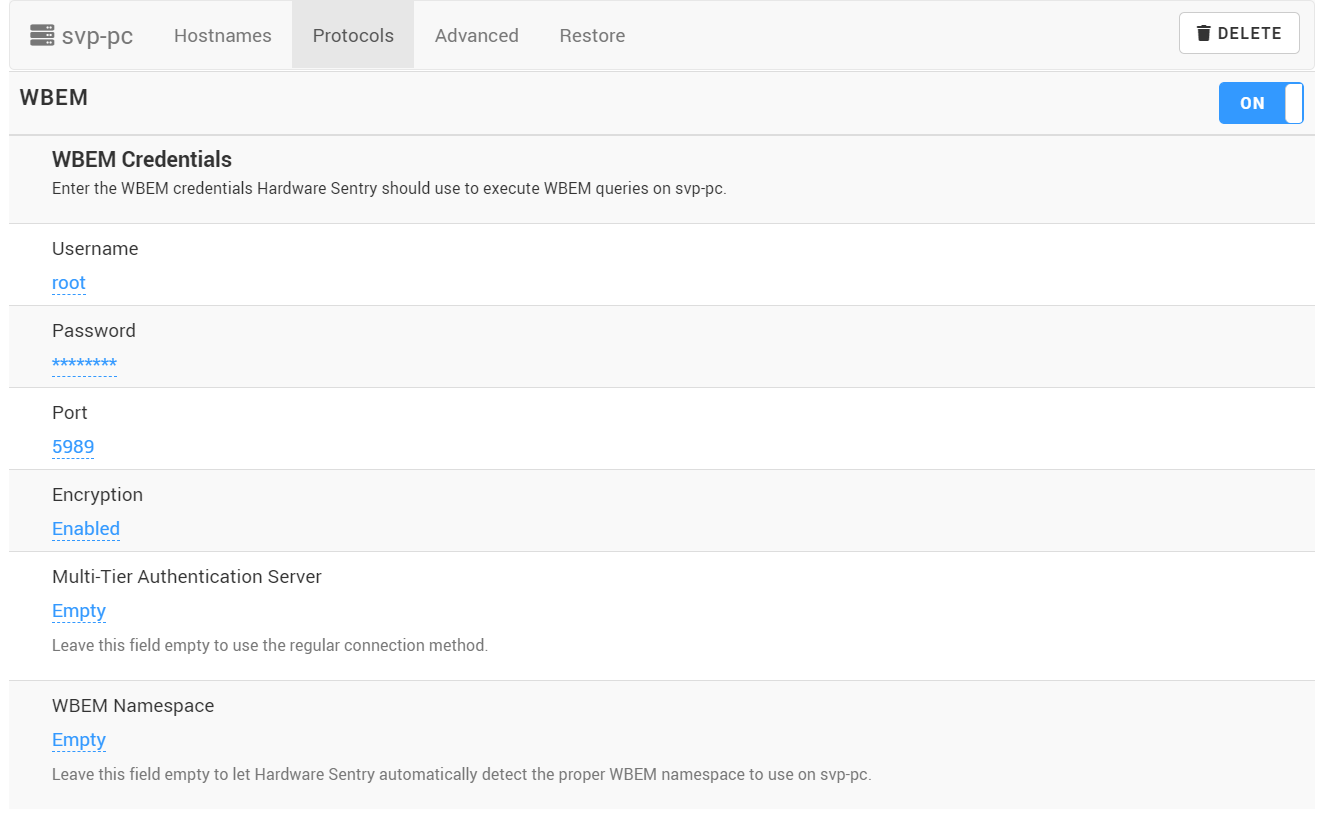
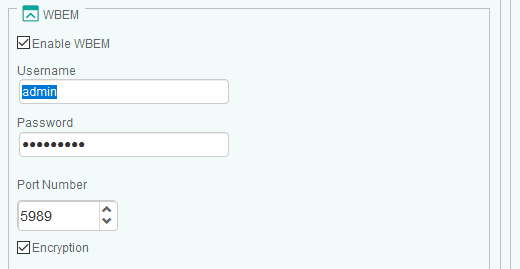
- WBEM to monitor Hitachi AMS, HUS, USP, VSP or Hitachi VSP G Series, and Hitachi HUS-VM
- SNMP to monitor Hitachi HNAS or Hitachi USP, and VSP
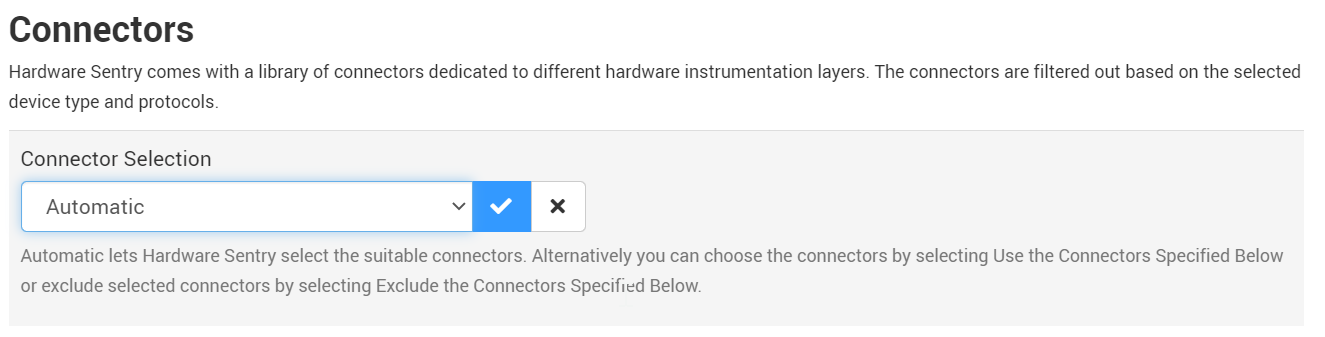
- Scroll-down to the Connectors section and select Automatic
-
Click Create.
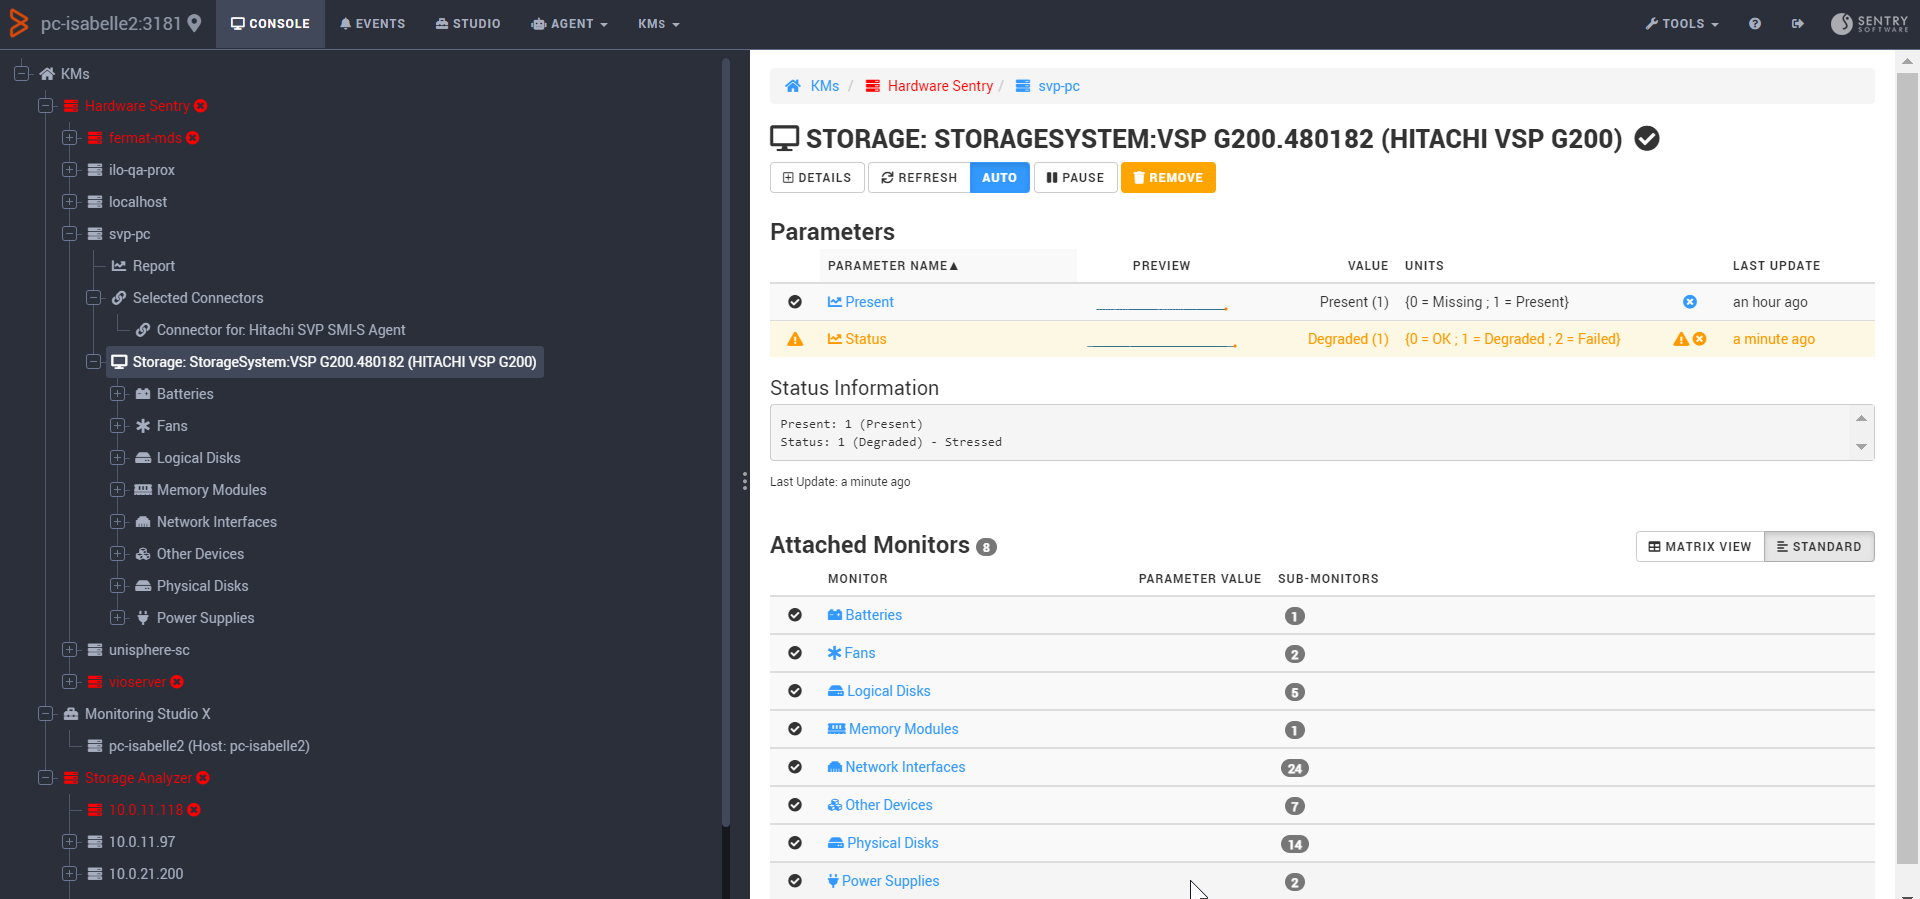
-
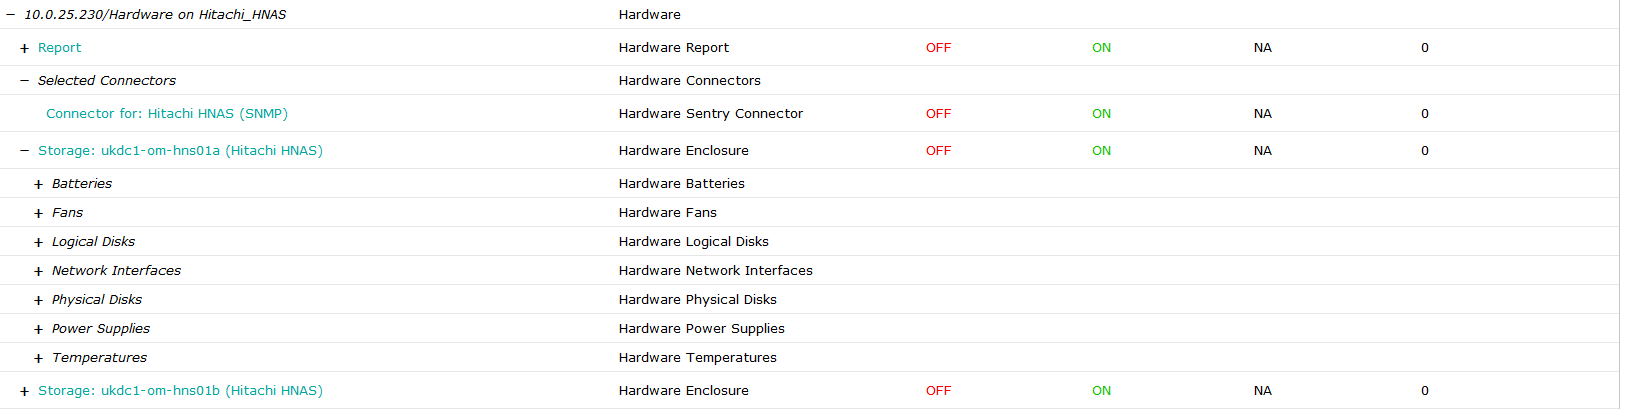
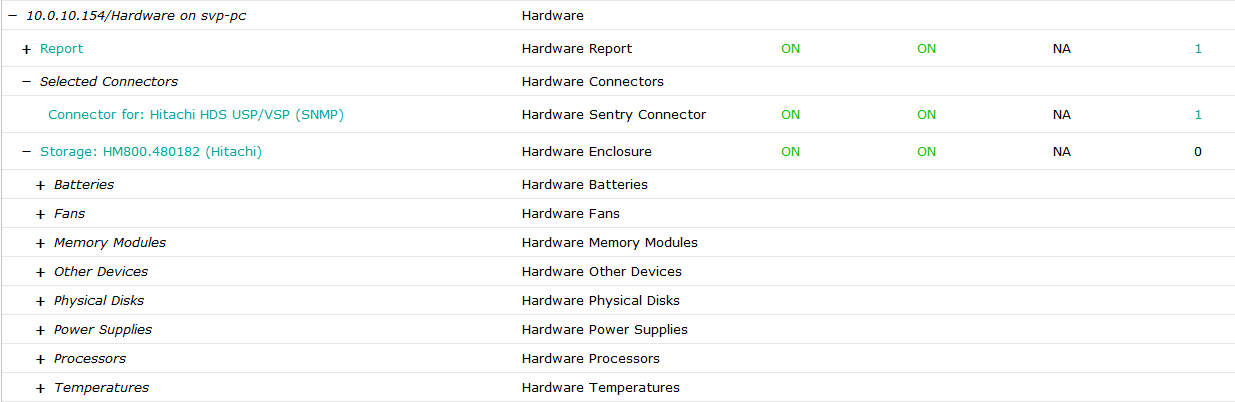
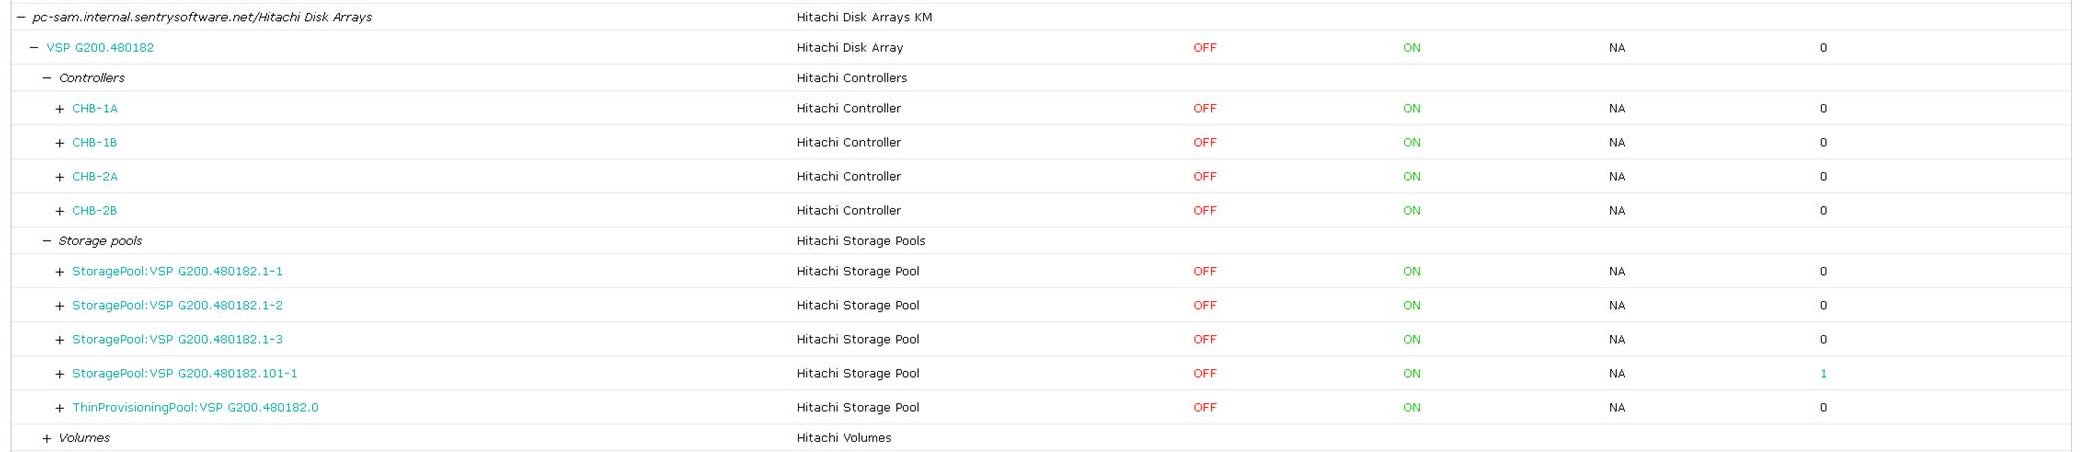
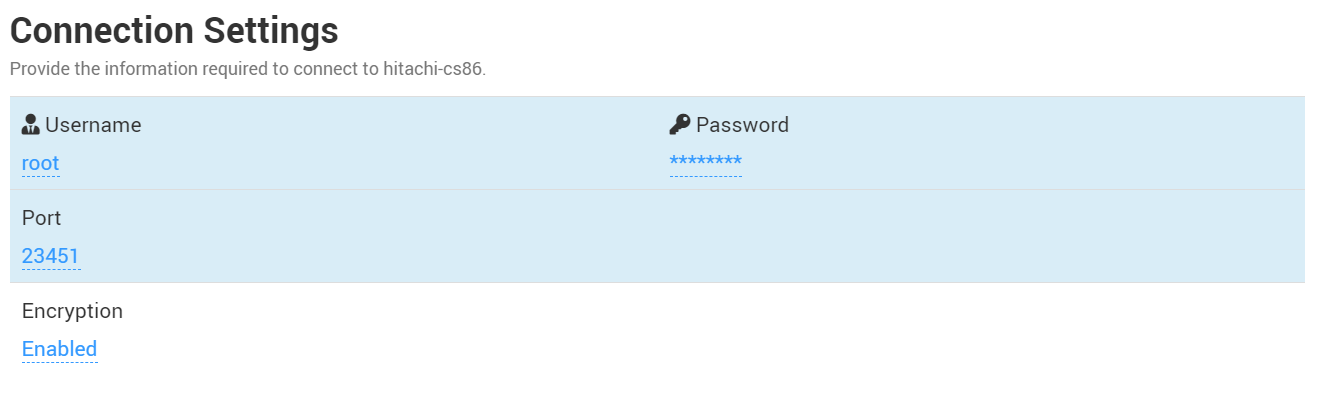
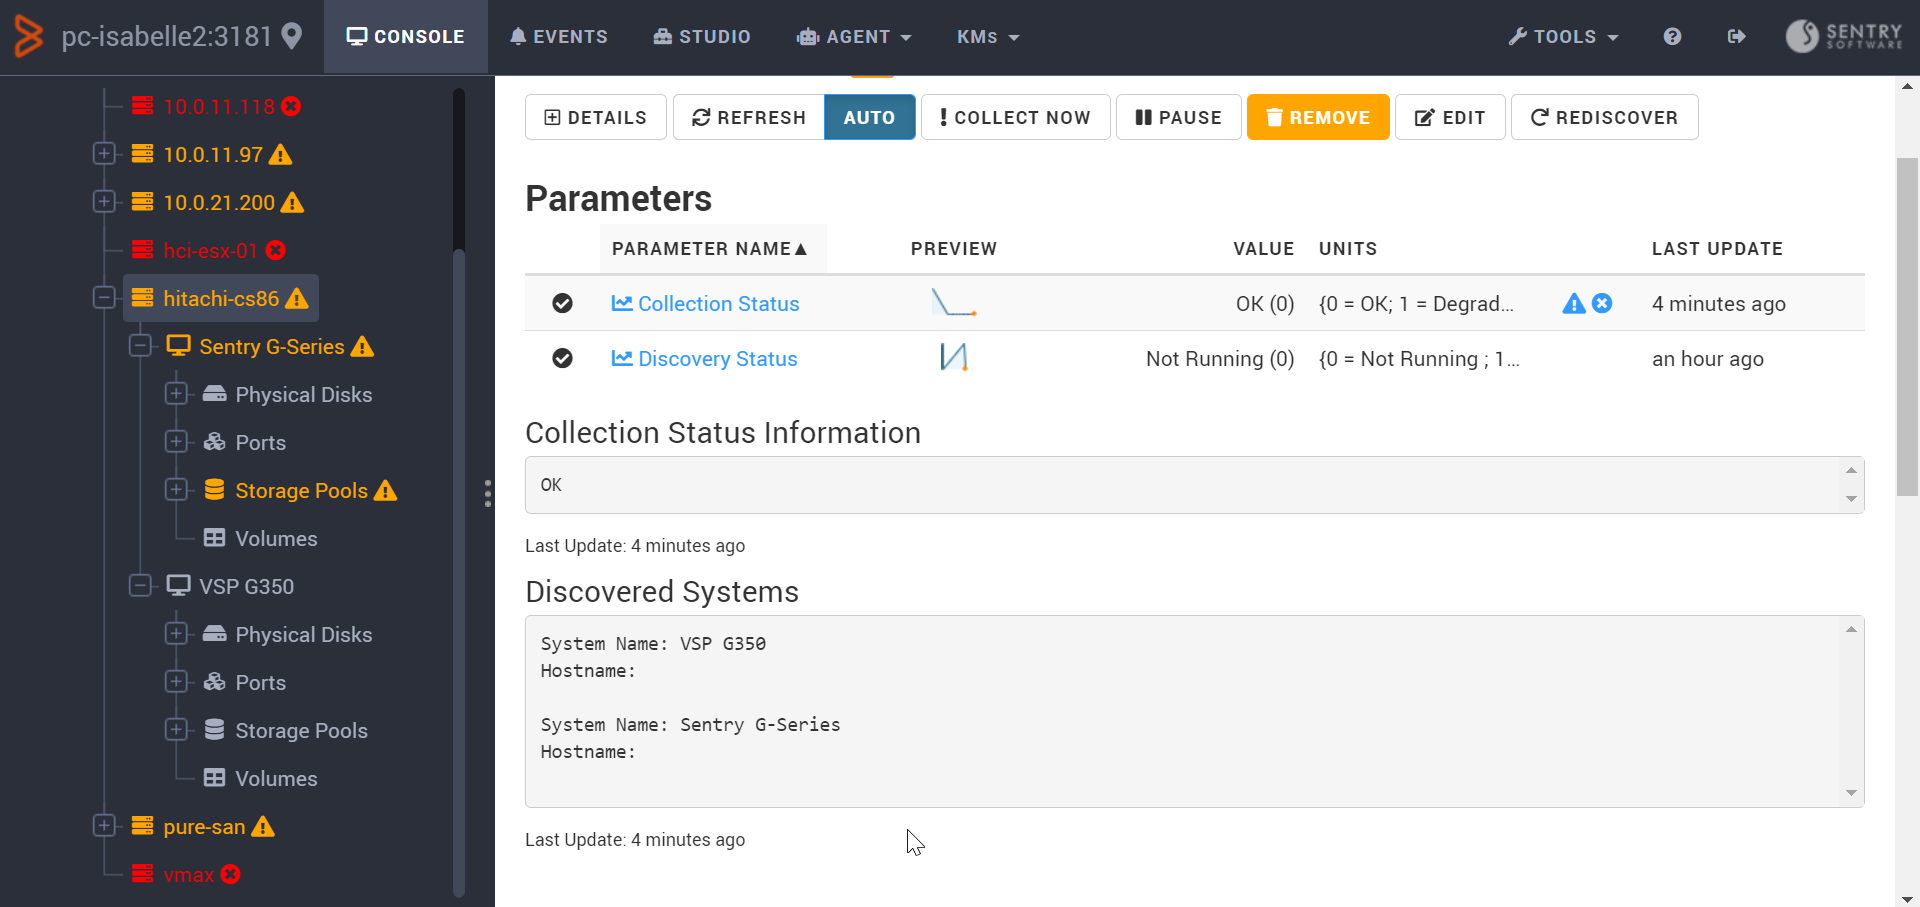
Click Console to check the hardware health status of your Hitachi disk array:
Configuring Hardware Sentry in TrueSight Presentation Server
To monitor your Hitachi disk arrays using Hardware Sentry:
-
Log in to TrueSight Presentation Server
-
Create a new policy:
- Specify the general properties and agent selection criteria.
- Add a monitoring configuration
- Select the Hardware Monitoring Solution
-
In the Hardware Configuration section, click Add:
- Indicate the name of the device you wish to monitor.
- Enter the IP address of the device. If no IP address is provided, the device name previously specified will be used.
- Select Storage (Array, Switch, Library) as Device Type.
-
Refer to the table below to know which protocol should be used to monitor your platform:
| Hitachi Platform | Technology/Protocol | Connector File Name |
|---|---|---|
| Hitachi AMS, HUS | System Commands | (Linux) MS_HW_HitachiSNM2CLILinux.hdf, (Windows) MS_HW_HitachiSNM2CLINT.hdf |
| Hitachi AMS, HUS, USP, VSP | WBEM | MS_HW_HitachiDiskArray.hdf |
| Hitachi HNAS | SNMP | MS_HW_HitachiHNAS.hdf |
| Hitachi USP, VSP | SNMP | MS_HW_HitachiVSPSNMP.hdf |
| Hitachi VSP G Series, Hitachi HUS-VM | WBEM | MS_HW_HitachiVSPDiskArray.hdf |
-
Configure the Protocol/Connection Information section, i.e.:
- SSH to monitor Hitachi AMS and HUS
- WBEM to monitor Hitachi AMS, HUS, USP, VSP or Hitachi VSP G Series, and Hitachi HUS-VM
- SNMP to monitor Hitachi HNAS or Hitachi USP, and VSP
-
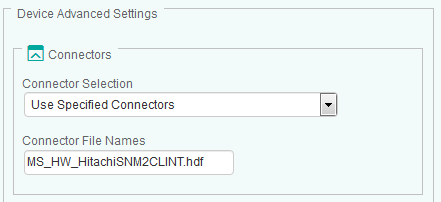
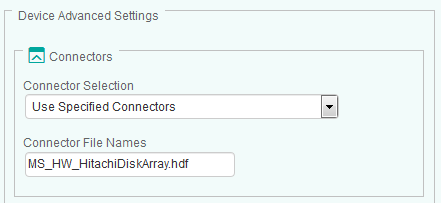
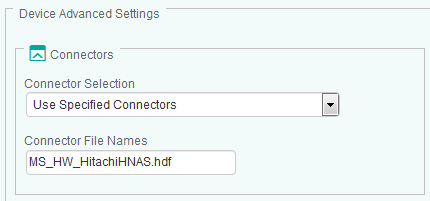
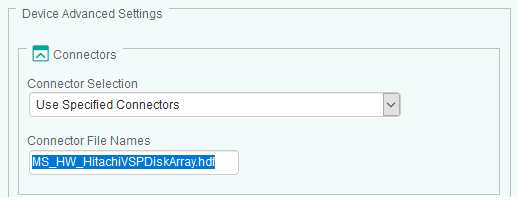
In the Device Advanced Settings section:
-
Select Use Specified Connectors
-
Specify the Connector File Name(s):
-
MS_HW_HitachiSNM2CLILinux.hdf or MS_HW_HitachiSNM2CLINT.hdf to monitor Hitachi AMS and HUS
-
MS_HW_HitachiDiskArray.hdf to monitor Hitachi AMS, HUS, USP, and VSP
-
MS_HW_HitachiHNAS.hdf to monitor Hitachi HNAS
-
MS_HW_HitachiVSPSNMP.hdf to monitor Hitachi USP and VSP
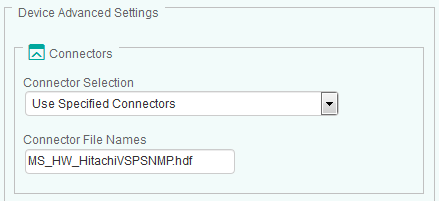
-
MS_HW_HitachiVSPDiskArray.hdf to monitor Hitachi VSP G Series and Hitachi HUS-VM.
-
-
-
Click OK.
-
Resume the procedure to configure the monitoring of your other Hitachi Disk Arrays.
-
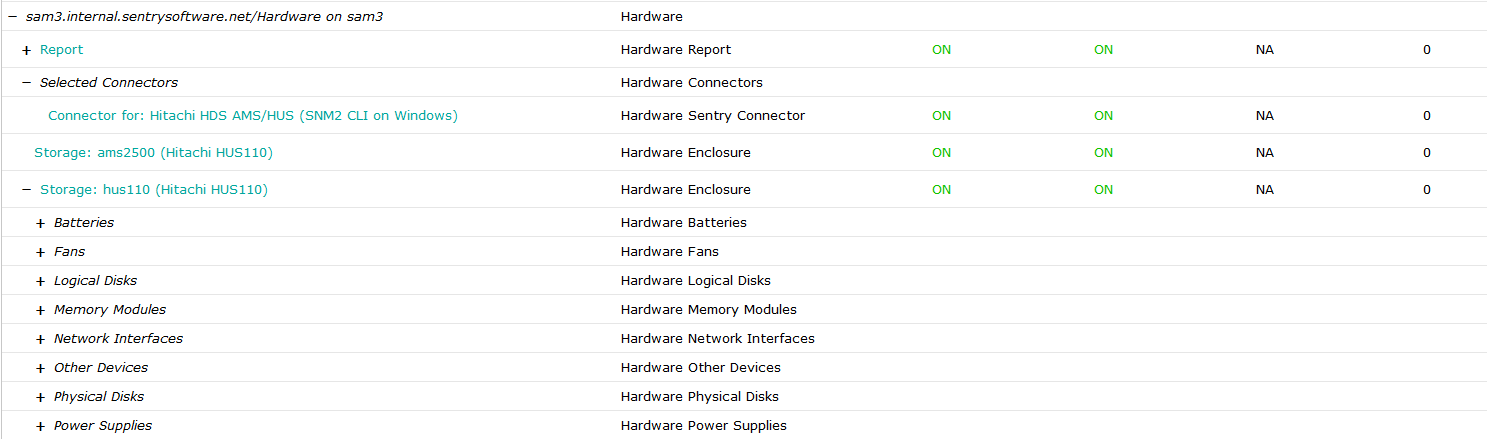
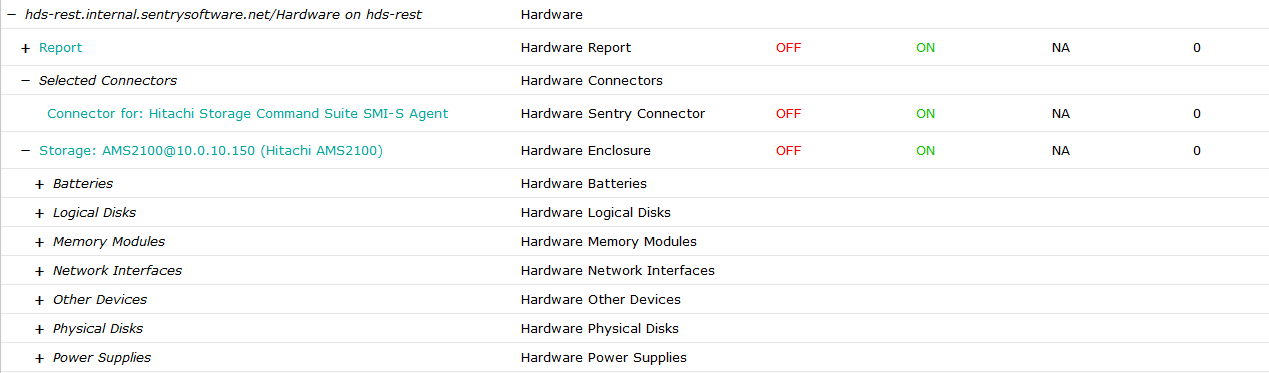
Click Save. After a few minutes, your devices will be displayed in TrueSight:
Using the Hitachi Disk Arrays KM for PATROL
To configure the monitoring of your Hitachi systems with the Hitachi Disk Arrays KM for PATROL:
-
Create a connection to the embedded SMI-S provider/Hitachi Device Manager:
-
Log in to TrueSight Presentation Server.
-
Create a new policy.
-
Specify the general properties and agent selection criteria.
-
Add a monitoring configuration.
-
Select the Hitachi Storage Monitoring Solution.
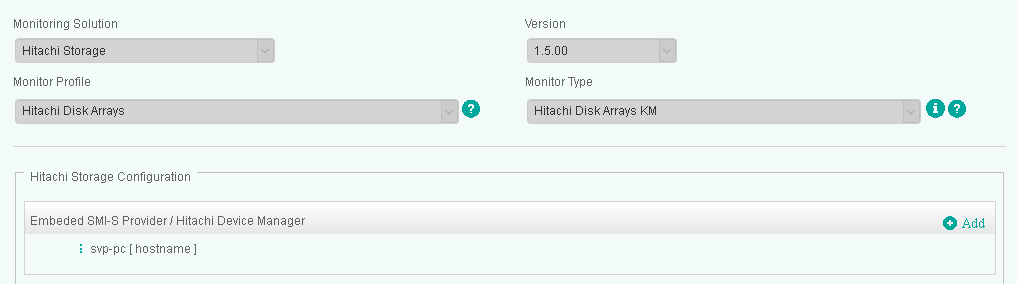
-
In the Hitachi Storage Configuration section, click Add to provide the credentials to connect to the embedded SMI-S provider or to the Hitachi Device Manager.
-
-
Click OK.
-
Resume the procedure to configure the monitoring of your other Hitachi Disk Arrays.
-
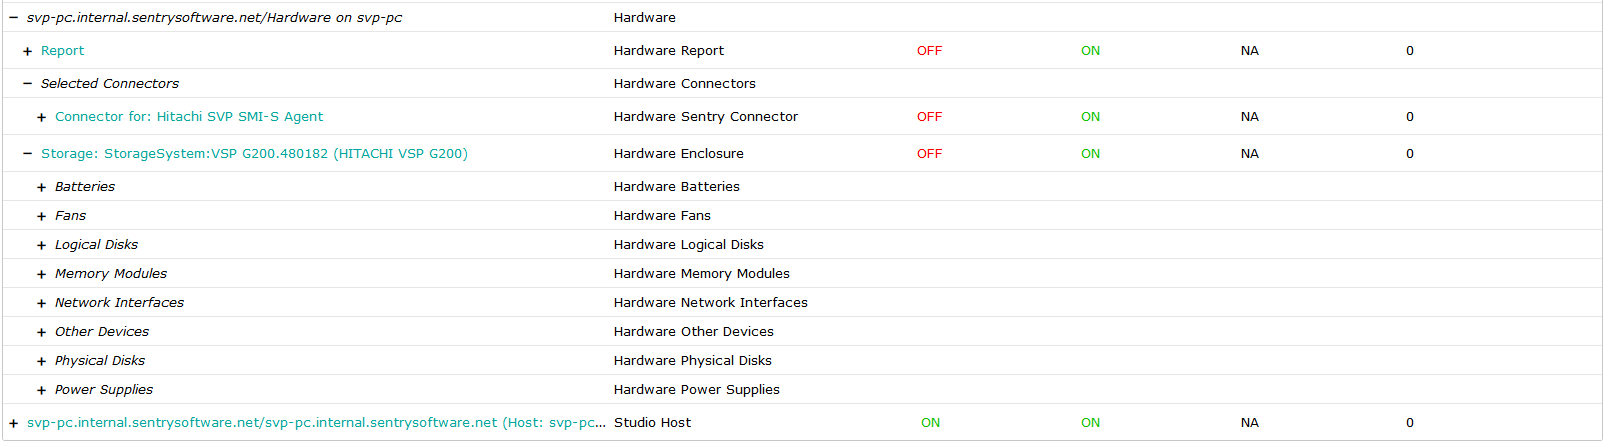
Click Save. After a few minutes, your devices will be displayed in TrueSight:
Using the Storage Analyzer KM
To monitor Hitachi G-Series with the Storage Analyzer KM:
- Make sure the Storage Analyzer KM and Monitoring Studio X are installed on the same machine
- Log in to the Monitoring Studio X Web interface
- Go to KMs > Storage Analyzer
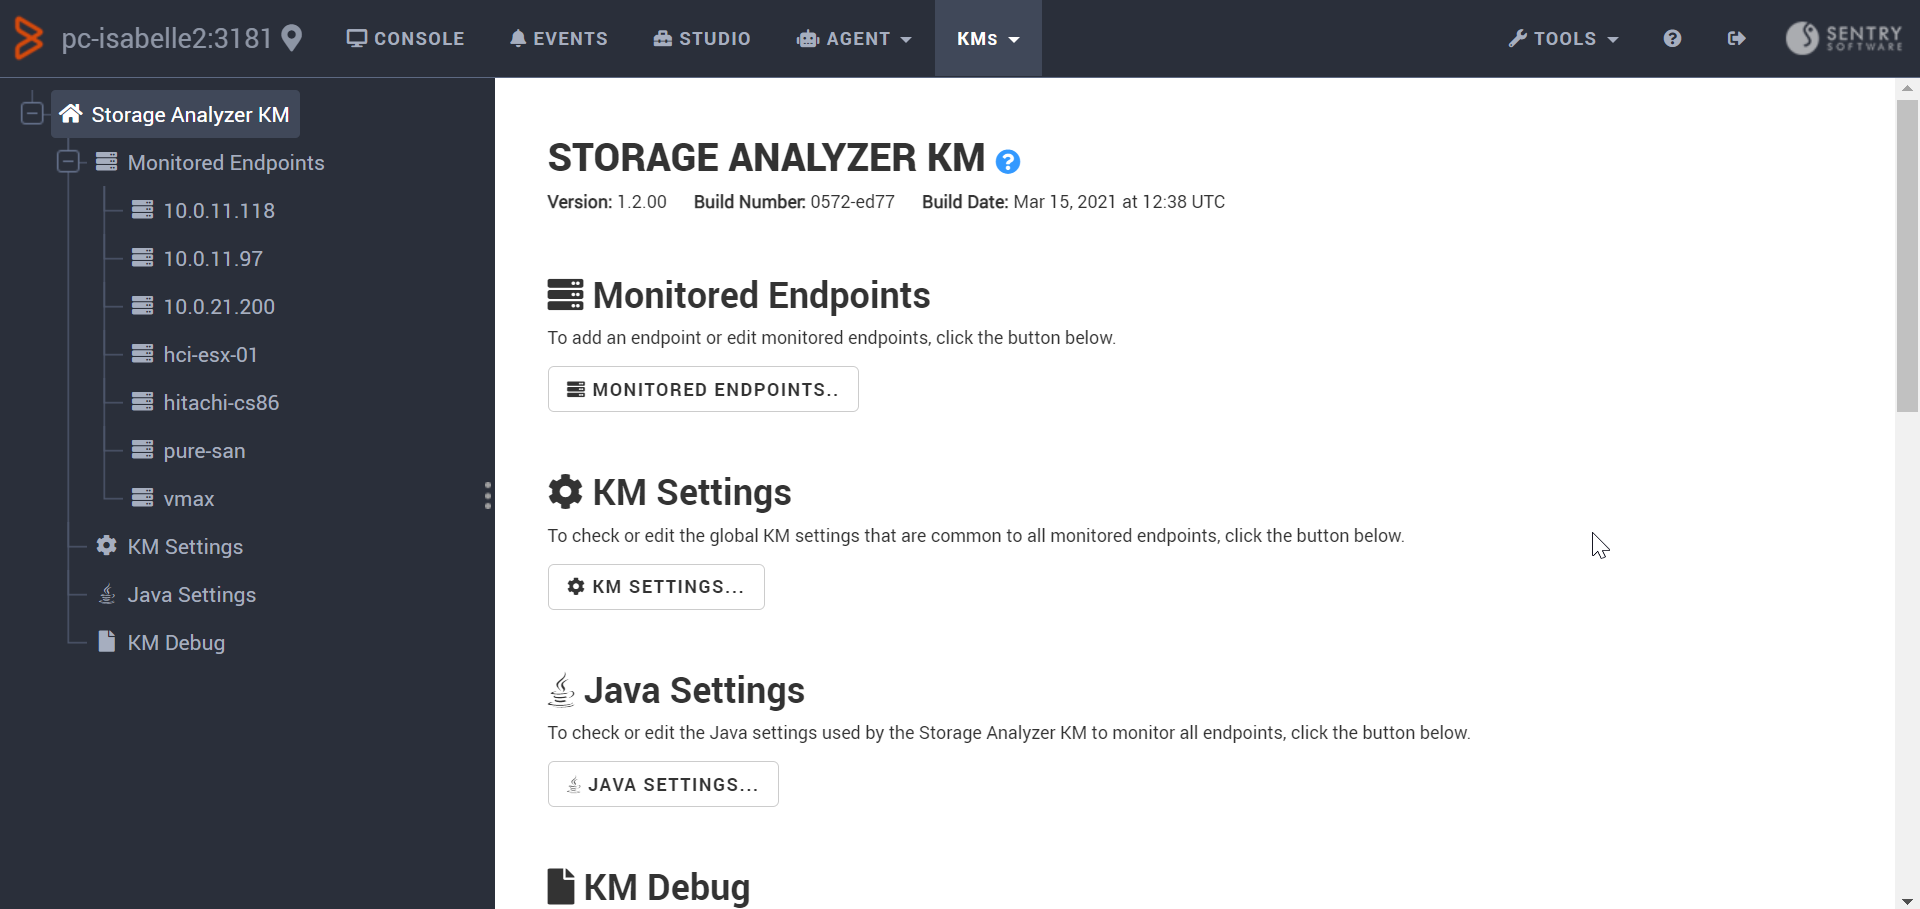
-
Click Monitored Endpoints… > New Endpoint…
-
Identify the Hitachi G-Series to be monitored:
- Enter the hostname or IP address of your Hitachi Configuration Manager REST API server
- Select the Hitachi G-Series (REST) Storage Intelligence Adapter
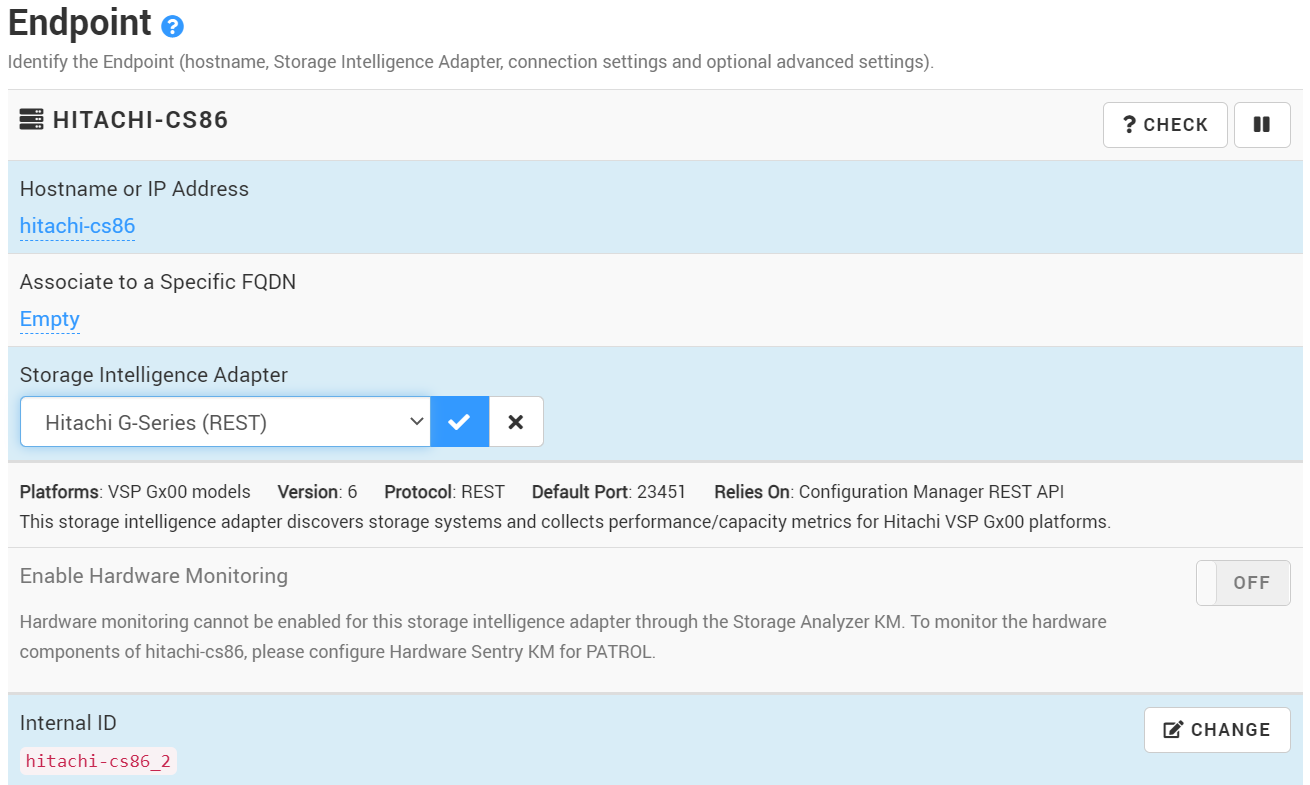
- Provide the information required to connect to the storage system
- Click Create.
- Click Console to access the performance and capacity metrics of your storage system
Related Topics
- How to Determine When to Disable Hardware Monitoring When Configuring a Storage Policy in BMC Helix Operations Management
- Required Roles and Permissions for Hardware and Storage Monitoring
- Leveraging the HSNM2 CLI to Monitor Hitachi (HDS) AMS, HUS Systems
- Hardware Monitoring: Monitoring Linux Servers in TrueSight
- Monitoring IBM DS3000, DS4000, and DS5000 Series Storage Systems