Introduction
This document describes the configuration steps required to monitor remote NetBackup appliances. This procedure has been tested with NetBackup 5000 series appliances. Should you need further details to configure the KM, please refer to the product’s documentation.
IMPORTANT: Remote monitoring is not possible from a UNIX/Linux Agent system to a Windows based NetBackup server.
Prerequisites
Monitoring remote NetBackup appliances requires:
JAVA
You can download the latest JRE package along with the KM on the Sentry Software Web site.
The KM will automatically detect the JRE path if it has been installed in the default location or under the BMC PATROL Agent installation path. If the JRE has been installed in a different location, make sure to set the Java home variable (JAVA_HOME) before starting the Agent.
NetBackup CLI User Account
A NetBackup CLI user is required to monitor NetBackup appliances.
To create a NetBackup user account:
- Open an SSH session on the NetBackup appliance
- Log on as admin
- Enter the following command:
- Main > Manage > NetBackupCLI > Create UserName (where UserName is the name to be used for the new user).
- Enter a password for this new user account
- A confirmation message appears stating the new user account was created successfully.
This user account should have the privileges to execute NetBackup and OS commands as described in the Security Requirements section of the user guide. For example, on a NetBackup appliance, the following sudo settings are required:
  #  Added for NetBackup KM

  User_Alias  NBUKMUSERS = nbucliuser

  Defaults:NBUKMUSERS  !lecture,!authenticate,\

  env_keep+="PATH  LIBPATH INSTALL_PATH KM_HOME KM_TEMP",env_reset
Once sudo is configured, test the NetBackup and OS commands from another UNIX/Linux host:
  root@sofia:~  #ssh nbucliuser@nbappl5220 sudo bpgetconfig -s nbappl5220 -l

  Password:

  Master;Linux,  SuSE2.6.16;7.6.1.0.0.1;NetBackup;7.6;760000;/usr/openv/netbackup/bin; Linux  2.6.32.59-0.7-default-fsl ;

  root@sofia:~ #ssh nbucliuser@nbappl5220 sudo  /usr/bin/du -sk /log

  Password:

  12899672        /log
SSH/WMI Connection
An SSH (UNIX/Linux platforms) or a WMI (Windows platforms) connection is required to monitor remote NetBackup servers and appliances. When using an SSH connection, the SSH host key authentication must be disabled on the remote host.
Disabling the SSH Host Key Authentication
SSH host key authentication is enabled by default on most NetBackup servers and appliances. To disable it:
- Open the global SSH configuration file (ssh_config) stored in the /etc/ssh/ directory on the remote host
- Add the line StrictHostKeyChecking no
- Save the file.
You should test the remote SSH communication by running a test command from the PATROL Agent node to the remote NetBackup server:
  root@sofia:~ #ssh nbucliuser@nbappl5220 uname -a

  Password:

  Linux nbappl5220 2.6.32.59-0.7-default-fsl #1 SMP  2012-07-13 15:50:56 +0200 x86_64 x86_64 x86_64 GNU/Linux
PATROL Monitoring Procedure
Once the KM is installed on a PATROL Agent node and loaded on the PATROL Console, the Veritas NetBackup main instance appears in the PATROL console.
![]()
Configuring a Remote NetBackup Node
To configure a remote NetBackup node:
- Right-click the Veritas NetBackup main instance > Configuration > NetBackup Nodes.
- Enter the remote NetBackup Server details.
- Click Update.
This KM command allows adding multiple NetBackup master and media servers for monitoring remotely.
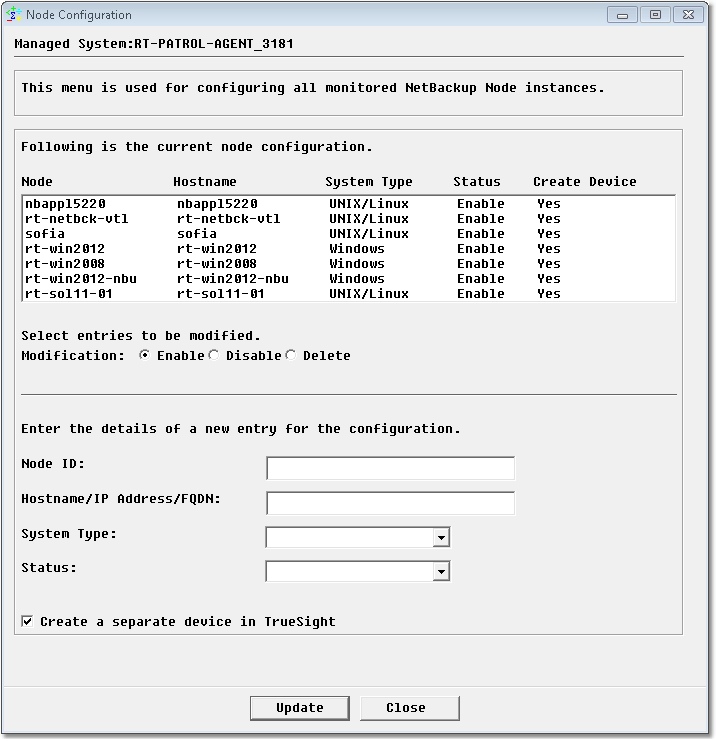
A NetBackup Setup node instance appears in the PATROL Console but the monitoring will not start until appropriate credentials are provided.
Configuring Credentials
Using the Configuration > Login KM Command, provide the username and password details for the NetBackup node.
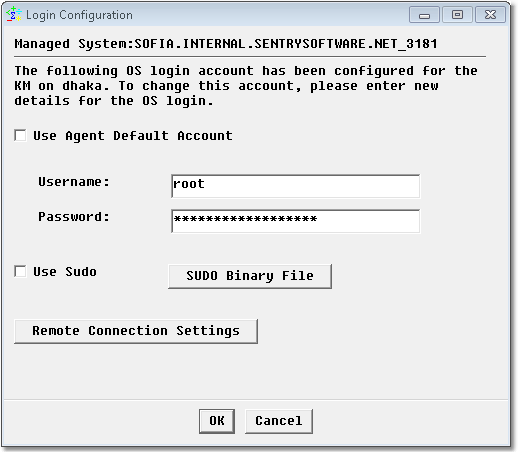
Once, everything is properly configured, the KM performs a first discovery and displays all the elements available in your PATROL environment.

BMC TrueSight OM (CMA) Monitoring Procedure
The BMC TrueSight Operations Manager CMA interface also supports the remote monitoring of Veritas NetBackup appliances.
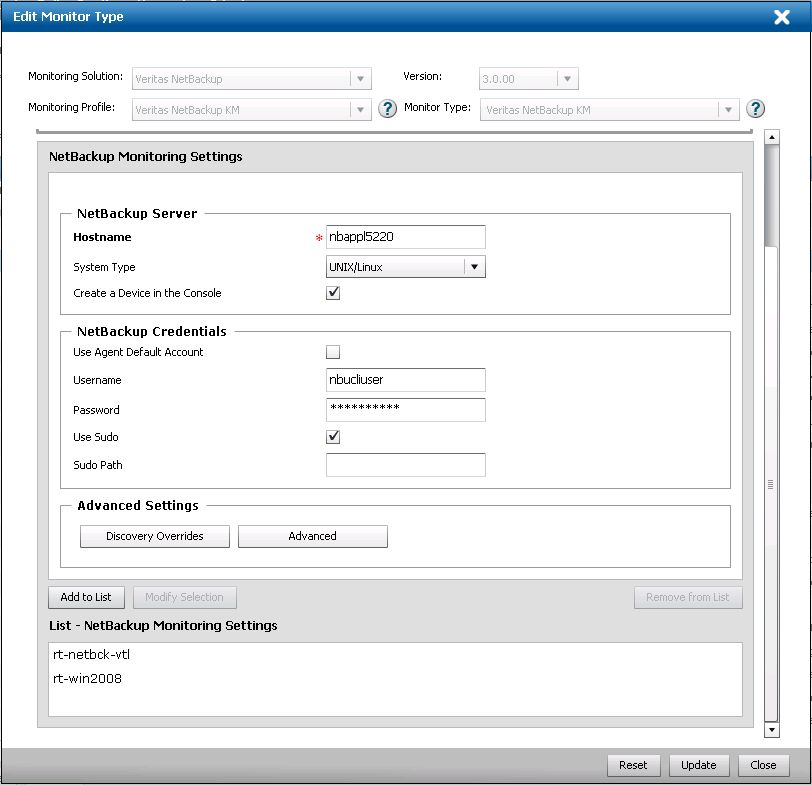
Configuring NetBackup Servers Monitoring
To specify the NetBackup master/media server or the NetBackup appliance to be monitored:
- Create a new monitor type
- From the Monitor Type menu, select Veritas NetBackup KM
- In the NetBackup Server section:
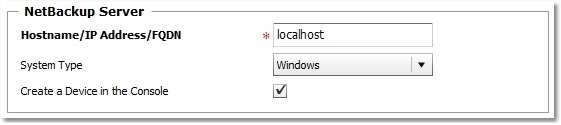
- (Required) Enter the Hostname, IP Address, or FQDN of the remote NetBackup server to be monitored.
- (Required) Specify whether the remote NetBackup server is a UNIX/Linux or Windows system.
- Check Create a Device in the Console if you want the remote NetBackup server to appear as a separate device in TrueSight OM.
You will then have to configure the user account to be used.
Configuring the User Account
A user account with administrative privileges must be configured in BMC TrueSight Operations Management to read and execute Veritas NetBackup application programs and file systems.
To configure the user account
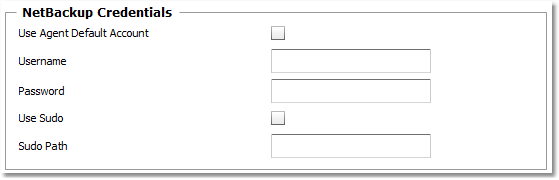
- Locate the NetBackup Credentials section:
- To use:
- the default PATROL Agent Account, check the Use Agent Default Account box and leave the Username and Password fields empty
- a different user account, enter the login details in the Username and Password fields
- (UNIX Only) If a sudo user account is used:
- check the Use Sudo box
- indicate the Sudo binary file path (by default: usr/local/bin/sudo)
- Click Add to List.
Once, everything is properly configured, the KM performs a first discovery and displays all the elements available in your TrueSight environment.