Downloads
Introduction
This article explains how to import the pre-built configuration into Monitoring Studio to monitor Promox Systems.
The monitoring of Proxmox Systems is performed using the pve CLI. Hence you will need access to the Proxmox server through SSH to execute the commands.
Monitored Parameters
The pre-built configuration collects the following metrics:
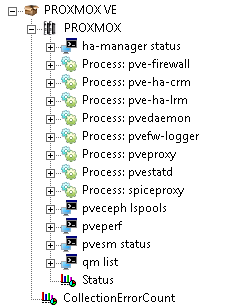
- Ha-manager status
- pve-firewall process
- pve-ha-crm process
- pve-ha-lrm process
- pvedaemon process
- pvefw-logger process
- pveproxy process
- pvestatd process
- spiceproxy process
- Ceph pools
- Usage percentage
- Pveperf
- Avg Seek Time ms
- Buffered Reads MB/sec
- CPU BOGOMIPS
- DNS EXT ms
- DNS INT ms
- FSYNCS/sec
- HD Size
- Regex/sec
- pvesm Data Stores
- Status
- Total Size
- Used Size
- Used Size in Percent
- Remaining Size
- qm list - VMs
- Bootdisk size
- Memory
- Status
Importing the Pre-Built Configuration
Pre-requisites
Before using the pre-built configuration, make sure that:
- a supported version of the PATROL Agent is installed and properly configured
- Monitoring Studio KM 9.4.03 or higher is installed with the latest patches and loaded on the PATROL Agent
- the
pveperfcommand is executing successfully as explains below:- Log on to the Proxmox system to be monitored
- Run the
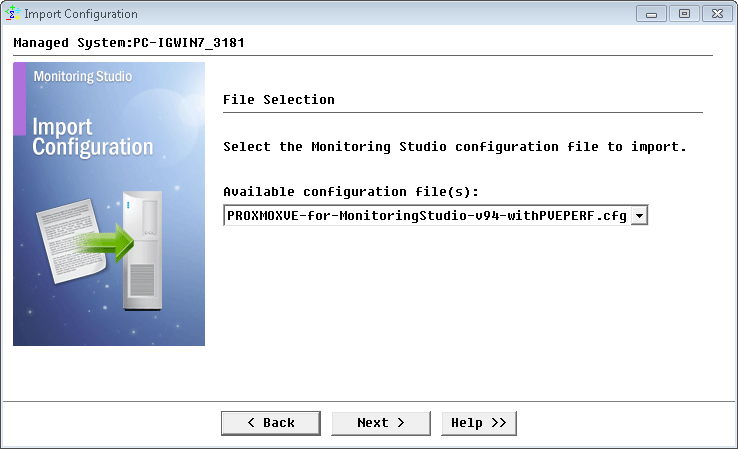
pveperfcommand at the command prompt. If the command:- is successful and takes less than 10-15 seconds, you can use the PROXMOXVE-for-MonitoringStudio-v94-withPVEPERF.cfg template
- fails or takes more than 10-15 seconds, terminate the
pveperfcommand and kill the orphan process. You will then have to use the PROXMOXVE-for-MonitoringStudio-v94-withoutPVEPERF.cfg template.
Procedure
-
Download the configuration file, unzip and copy it on the server where the PATROL Agent is installed and loaded with the Monitoring Studio KM.
-
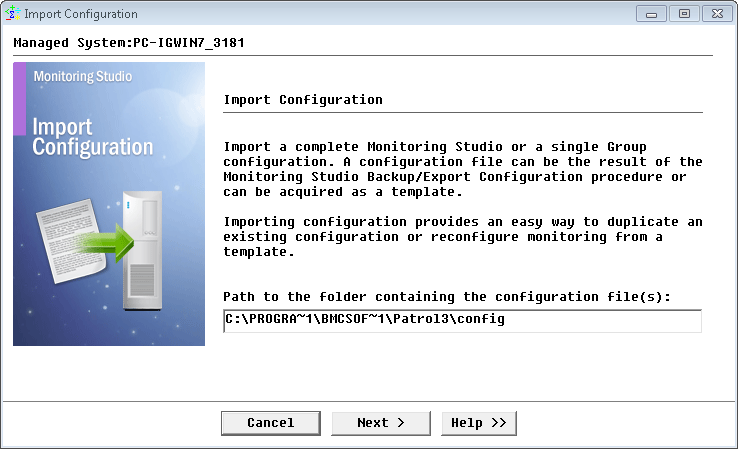
Right-click on the main Monitoring Studio icon > KM Commands > Configuration > Import Configuration…
-
Locate the folder where the downloaded .cfg file is saved, select the relevant template and click Next
-
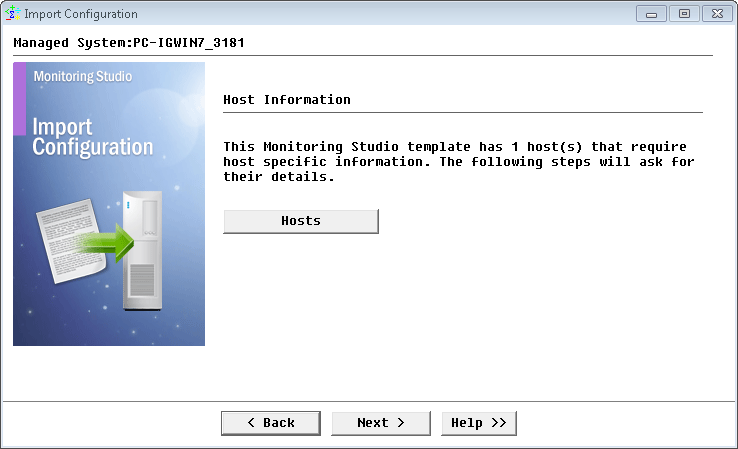
Monitoring Studio indicates the number of hosts found in the configuration file that require specific information before being imported. You can click the Hosts button to view the list. Click Next.
-
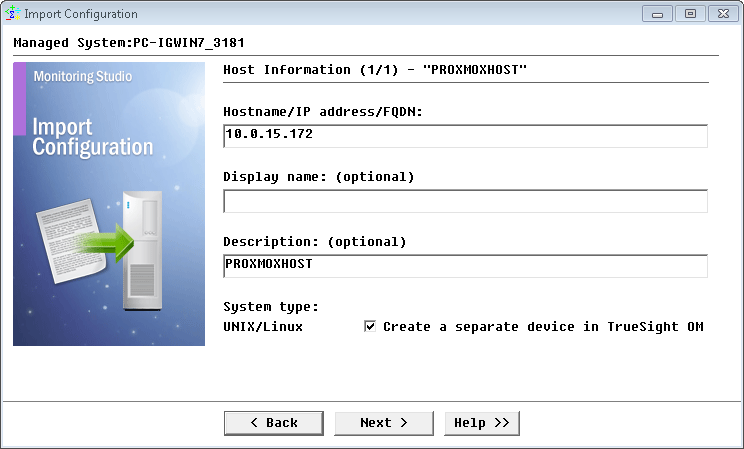
Provide the hostname, IP address or FDQN of the Proxmox server to be monitored and click Next.
-
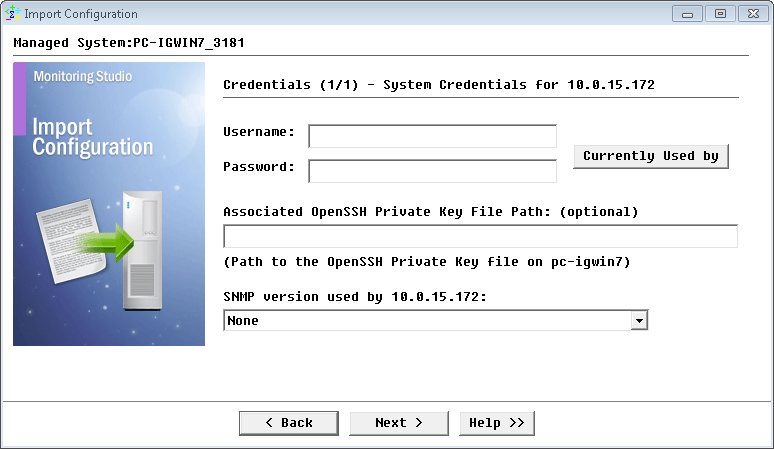
Specify the username and password that have access rights to execute the commands on the Proxmox system and click Next.
-
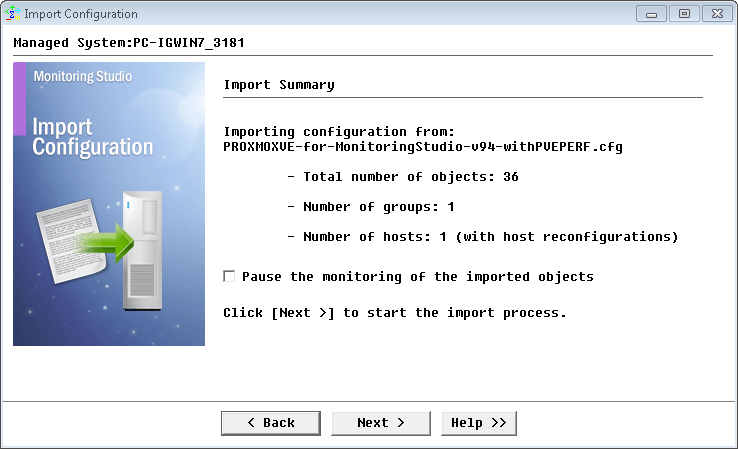
Review the Import Summary and click Next.
-
Click Finish.
Note: Thresholds are not set by default. We recommend you set them according to your specific requirements.
Learn More
To learn more about the Monitors used in this configuration template, please refer to the Specifying the Monitors Used section of the user documentation.
Please refer to Professional Services page to learn more about the consulting services available.
Related Topics
- Monitoring Squid Cache Proxy using Monitoring Studio KM
- Monitoring Dell EMC Avamar Appliances using Monitoring Studio KM
- Monitoring NetApp E Series Storage Devices using Monitoring Studio KM
- Monitoring EMC ViPR Controllers using Monitoring Studio KM
- Monitoring IBM DataPower Appliance using Monitoring Studio KM
