Downloads
Introduction
This article explains how to import the pre-built configuration into Monitoring Studio to monitor the Hitachi Content Platform through its embedded SNMP agent.
The pre-built configuration requires that the system running the PATROL Agent (v9.6 and higher) have access to the SNMP Agent on the device through the SNMP protocol to monitor the health, capacity, and performance metrics of the Hitachi Content Platform.
Monitored Parameters
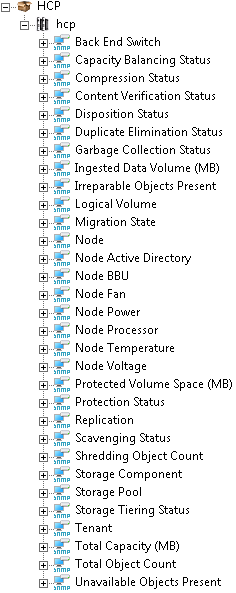
The pre-built configuration collects the following metrics:
| PATROL Console | Collected Parameters |
|---|---|
 |
|
Importing the Pre-Built Configuration
Pre-requisites
Before using the pre-built configuration, make sure that:
- You have access to the SNMP Agent embedded on the Hitachi Content Platform through SNMP v1, v2c, or v3,
- The PATROL Agent 9.6 or later is installed and properly configured,
- Monitoring Studio KM 9.4 or higher is installed with the latest patches and loaded on the PATROL Agent.
Procedure
- Download the Hitachi-Content-Platform-for-MSv94-v1.zip file, unzip the cfg file and copy it on the server where the PATROL Agent and the Monitoring Studio KM is installed.
- Right-click on the main Monitoring Studio icon > KM Commands > Configuration > Import Configuration
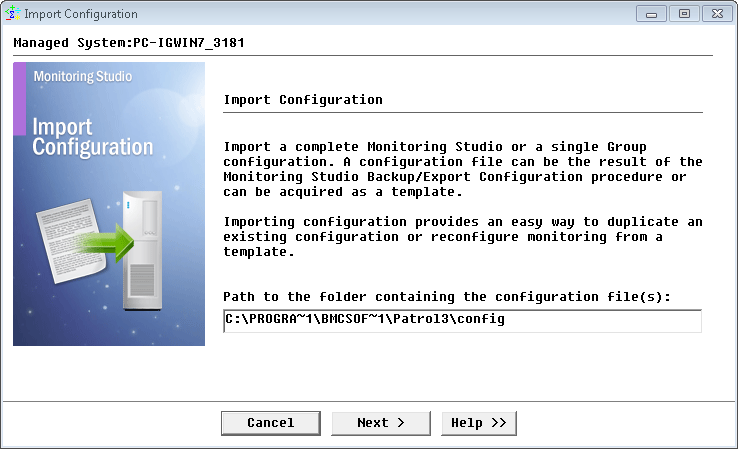
Figure 1 - Importing the Hitachi Content Platform pre-built configuration
- Locate the folder where the downloaded .cfg file is saved and select the Hitachi Content Platform configuration file.
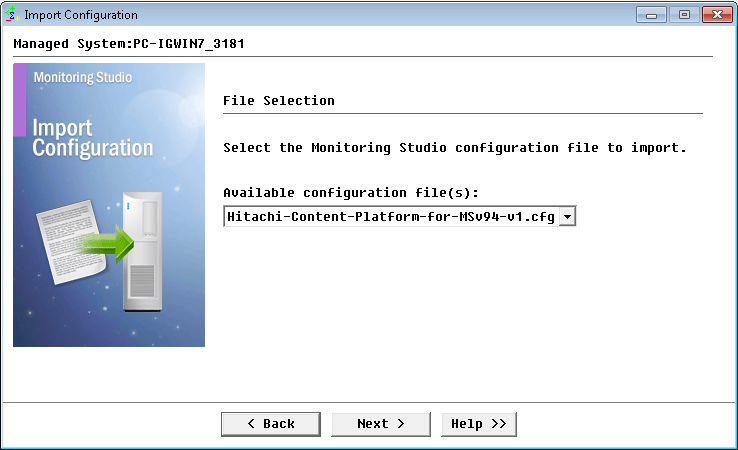
Figure 2 - Selecting the Hitachi Content Platform pre-built configuration to import
- Review the Import Summary and click Next.
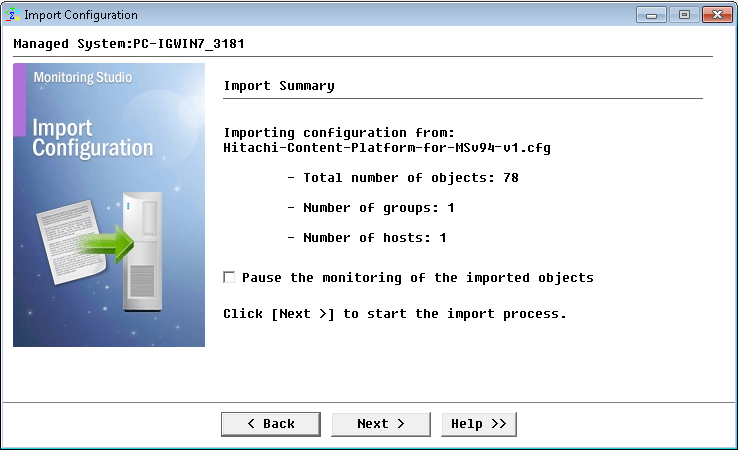
Figure 3 - Reviewing the Hitachi Content Platform pre-built configuration import summary
- When the import process is complete, click Finish.
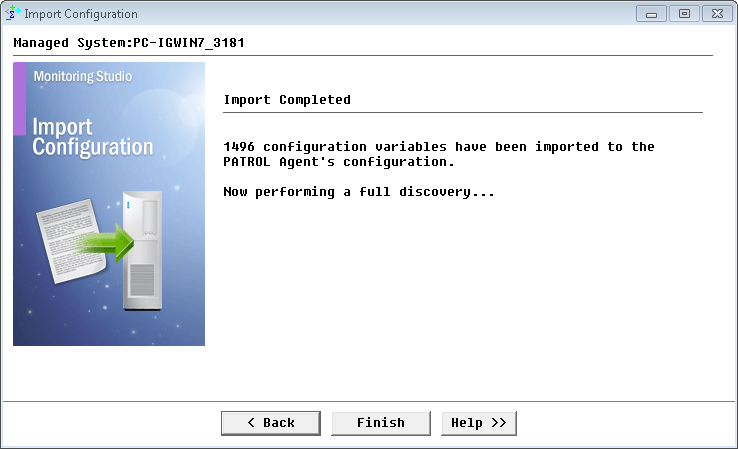
Figure 4 - Completing the Hitachi Content Platform pre-built configuration import
- In the PATROL Console, under the HCP container, right-click the hcp host and click Edit.
- Specify the hostname or IP address of the HCP host to be monitored and click Next.

Figure 5 - Specifying the hostname or IP address of the HCP host to be monitored
- Specify the system credentials (optional) and the SNMP version you wish to use and click Next.
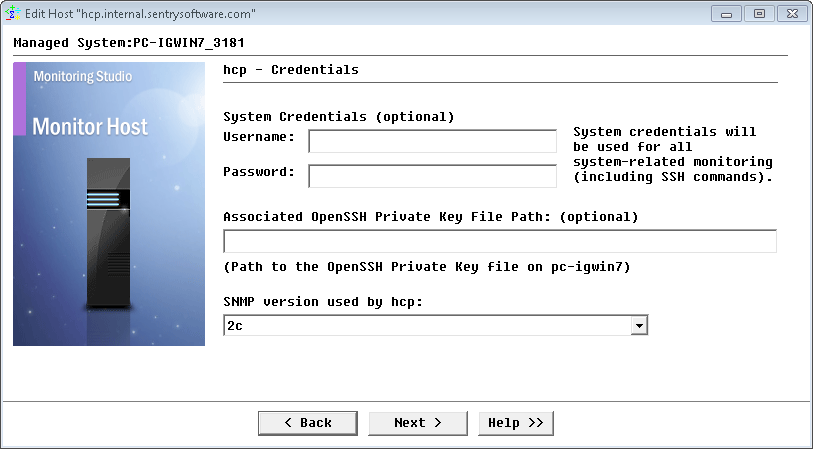
Figure 6 - Providing credentials and SNMP version
Note: For SNMP v1 and v2c, provide the SNMP community string; for SNMP v3 enter the credentials. - Select the option corresponding to the test method you wish to use to verify the host availability (optional).
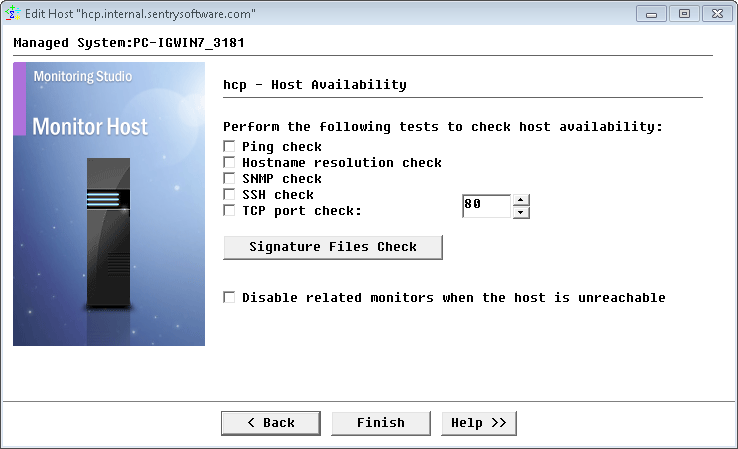
Figure 7 - Verifying host availability
- Click Finish to launch the discovery.
Learn More
To learn more about the monitor types used in this configuration template, please refer to the Specifying the Monitors Used section of the user documentation.
Please refer to Professional Services page to learn more about the consulting services available.
Related Topics
- Monitoring Nimble Storage Appliances with Monitoring Studio
- Monitoring F5 BIG-IP Systems with Monitoring Studio
- Monitoring IBM FlashSystem 900 Storage Devices with Monitoring Studio
- Monitoring the EMC SMI-S Provider with Monitoring Studio
- Monitoring EMC Data Domain Storage Devices with Monitoring Studio